Last year, I made several food-related resolutions. Here is a review and whether I have accomplished them:
1. Make espresso-based drinks as good as the coffee houses - I was fine until the frother on my espresso maker broke. It's clogged and I cannot unclog it no matter how many times I've tried cleaning it.
2. Make Baked Alaska - I still haven't gotten around to this!
3. Eat something new - I've had fresh beets, collard greens, and catfish.
4. Bake a pie from scratch - I have several times.
5. Bake biscotti - It was one of the Tuesdays With Dorie challenges.
Four out of five isn't bad at all. This year's resolutions will be:
1. Make Baked Alaska - I'm still determined to make this.
2. Decorate cookies and/or cakes and be proud - This involves me actually buying a decorator's kit. Any suggestions? Maybe I'll ask for it as a birthday gift in May.
3. Share my goodies more often - I'm always hesitant in sharing outside of my family and close friends because I'm afraid they won't be good enough.
4. Eat more locally - I didn't start doing this until my trip to Savannah, GA. Now I'm more open to eating at places that aren't a national chain. I'll have the opportunity again when I go back to Washington, DC in March and Nashville, TN in May. If you have been to those places and have suggestions as to where I should eat, let me know.
5. Be better at food photography - Tastespotting and Foodgawker are photo snobs, and as much as they piss me off, I'm still trying to get my photos on their sites because they bring in major blog traffic. I know my pictures aren't the best, but I've seen pictures just as good or even worse than mine.
Wednesday, December 31, 2008
Winding Down 2008
Here's one last holiday cookie recipe for 2008. This cookie needs time to chill in the refrigerator because it softens quite easily, but once cut and baked, they look beautiful. Although these look nice on a holiday cookie tray, you could probably make these any time during the year, maybe even change up the flavors and color.

Mint is one of my favorite flavors. I decided this holiday to give in and buy peppermint extract. I used it in my peppermint bark and these cookies. I was going to do cupcakes, but my brother brought home a cookie tray from his work, so we were over our heads in sweets.
Chocolate Mint Pinwheels

1/4 cup sugar
1/4 cup butter, softened
1 Tbsp water
1 1/2 tsp oil
1 tsp baking powder
1/2 tsp vanilla extract
1/8 tsp peppermint extract
3/4 cup flour
1/4 tsp baking powder
1/8 tsp salt
1/2 oz. unsweetened baking chocolate, melted
1-2 drops green food coloring
1. In large mixing bowl, beat sugar, butter, water, oil, 1 tsp baking powder, vanilla, and peppermint extract at medium speed until creamy (2-3 minutes). Reduce speed to low. Add flour, 1/4 tsp baking powder, and salt. Beat until well mixed (1-2 minutes).
2. Remove half of dough. Add melted chocolate to one half and food coloring to the other half. Shape each half into a rectangle and wrap in plastic food wrap. Refrigerate 1 hour.
3. Roll out each rectangle thin but not too thin. Place green rectangle on top of chocolate rectangle. Gently press together. Roll up, jelly roll fashion. Refrigerate for another 2 hours.
4. Preheat oven to 375F. Cut roll into 1/4-inch slices. Place onto an ungreased cookie sheet. Bake 7-9 minutes or until set. Cool completely.
Makes 12 cookies.
Source: Land-O-Lake's 5th Annual Holiday Cookies, 1998 p.24
Mint is one of my favorite flavors. I decided this holiday to give in and buy peppermint extract. I used it in my peppermint bark and these cookies. I was going to do cupcakes, but my brother brought home a cookie tray from his work, so we were over our heads in sweets.
Chocolate Mint Pinwheels
1/4 cup sugar
1/4 cup butter, softened
1 Tbsp water
1 1/2 tsp oil
1 tsp baking powder
1/2 tsp vanilla extract
1/8 tsp peppermint extract
3/4 cup flour
1/4 tsp baking powder
1/8 tsp salt
1/2 oz. unsweetened baking chocolate, melted
1-2 drops green food coloring
1. In large mixing bowl, beat sugar, butter, water, oil, 1 tsp baking powder, vanilla, and peppermint extract at medium speed until creamy (2-3 minutes). Reduce speed to low. Add flour, 1/4 tsp baking powder, and salt. Beat until well mixed (1-2 minutes).
2. Remove half of dough. Add melted chocolate to one half and food coloring to the other half. Shape each half into a rectangle and wrap in plastic food wrap. Refrigerate 1 hour.
3. Roll out each rectangle thin but not too thin. Place green rectangle on top of chocolate rectangle. Gently press together. Roll up, jelly roll fashion. Refrigerate for another 2 hours.
4. Preheat oven to 375F. Cut roll into 1/4-inch slices. Place onto an ungreased cookie sheet. Bake 7-9 minutes or until set. Cool completely.
Makes 12 cookies.
Source: Land-O-Lake's 5th Annual Holiday Cookies, 1998 p.24
Tuesday, December 30, 2008
Tuesdays With Dorie - Tall and Creamy Cheesecake

I hope everyone had a wonderful holiday. For Christmas dessert, I made Dorie's Tall and Creamy Cheesecake. And boy did she mean tall. She called for a 9 inch pan with 2 3/4 inch tall sides. Otherwise, you'll be left with extra filling. And look how much filling mine made:

9 inch cake pan, 3 small springform heart pans, and 4 ramekins
So if you don't have the appropriate pan and not feeding a crowd, I suggest cutting the recipe in half. Since I wasn't accounting for the extra pans, I only made the crust for the small heart pans (which I was originally planning to serve). I don't know if water accidentally got into the bottom of the pans, but my crust was a little soggy. The filling was amazingly creamy (and rich!) I used all heavy cream, but next time I may do 2/3 heavy cream and 1/3 sour cream. Also, I opted for plain cheesecake. Now that the recipe is successful, I will experiment with the flavors. It did take a lot of time and beating though! Since I only have a hand mixer, my arm was sore.
Some of the TwDers experienced cracked tops. Fortunately (and surprisingly!), mine weren't. This was my first cheesecake completely from scratch.
Tall and Creamy Cheesecake

Thanks for this week goes to Anne of Anne Strawberry for picking the recipe. You can find it on page 235-237 of Baking: From My Home To Yours or on Anne's blog.
Tuesday, December 23, 2008
Chocolate Covered Cherries? Not Exactly...
I love chocolate covered cherries. I could probably eat an entire box myself, so whenever I stumbled upon this recipe at school one day, I knew I had to make them for Christmas. I tweaked the recipe a bit because there wasn't enough liquid holding the dough together. I also cut it down to one dozen because we are dealing with enough cookies already. Some of the recipe reviewers suggested using the chocolate cherry kisses Hershey makes to bring the whole recipe together, but since we already had regular kisses in the house, that's what I used. Make sure you put enough chopped cherry in the dough because the bites without the cherries lack some of the cherry flavor.
Cherry Chocolate Blossoms

1/4 cup powdered sugar
1/4 cup butter or margarine, softened
1 Tbsp maraschino cherry juice
1/4 tsp almond extract
2-3 drops red food coloring
2/3 cup flour
1/8 tsp salt
2 Tbsp maraschino cherries, chopped
12 chocolate kisses, unwrapped
1. Preheat oven to 350F. Combine powdered sugar, butter, juice, almond extract, and food coloring. Add flour and salt. Mix well. Stir in chopped cherries.
2. Roll dough into balls and place on ungreased cookie sheet. Bake 10-12 minutes or until edges are slightly browned. Immediately top each cookie with a kiss, pressing down firmly to flatten out cookies. Remove to cooling rack.
Makes 12 cookies.
Source: Recipe Zaar
Cherry Chocolate Blossoms
1/4 cup powdered sugar
1/4 cup butter or margarine, softened
1 Tbsp maraschino cherry juice
1/4 tsp almond extract
2-3 drops red food coloring
2/3 cup flour
1/8 tsp salt
2 Tbsp maraschino cherries, chopped
12 chocolate kisses, unwrapped
1. Preheat oven to 350F. Combine powdered sugar, butter, juice, almond extract, and food coloring. Add flour and salt. Mix well. Stir in chopped cherries.
2. Roll dough into balls and place on ungreased cookie sheet. Bake 10-12 minutes or until edges are slightly browned. Immediately top each cookie with a kiss, pressing down firmly to flatten out cookies. Remove to cooling rack.
Makes 12 cookies.
Source: Recipe Zaar
Monday, December 22, 2008
It's Beginning To Look A Lot Like Christmas...
Now that Christmas is only a few days away, time to get some serious holiday baking finished. If you are pressed for time or just too tired to make any more cookies, you can make this easy Peppermint Bark. It also lets you relieve some stress because you crush the candy canes (although I had some trouble).
Peppermint Bark

All you do is melt white chocolate, mix in crushed peppermints and a little bit of peppermint extract, spread it on some wax paper, and let chill for about an hour or so. Once it is hardened, you break into chunks. Perfect when company arrives on short notice.
Source: Recipe Zaar
Peppermint Bark
All you do is melt white chocolate, mix in crushed peppermints and a little bit of peppermint extract, spread it on some wax paper, and let chill for about an hour or so. Once it is hardened, you break into chunks. Perfect when company arrives on short notice.
Source: Recipe Zaar
Tuesday, December 16, 2008
Another Giveaway!
Every year, we spend lots of money for the holidays, whether it's presents, hosting parties, or baking cookies. Head on over to Zesty Cook and win yourself a $100 Amazon gift card (or $100 Paypal deposit)! I know I sure could use it!
Monday, December 15, 2008
The Spirit of Cupcakes
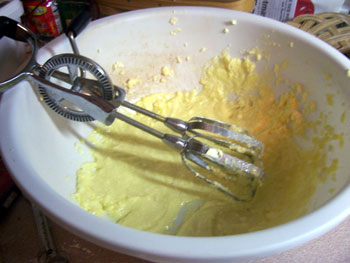
Well, I'm home from school for the holidays, although it doesn't feel like it. I'm slowly regaining my spirit after an incident last week, but that's life for you. And although lately a lot of my baking has been a flop, I did somewhat make cupcakes. I put too much batter in because the overfill resulted in a flat and brittle top. At least they tasted good, especially with peanut buttercream on top.
I halved the recipe and got 6 cupcakes. The recipe below makes 12 cupcakes and without leftover frosting. To halve the 3 eggs, use 1 egg, 1 Tbsp water, 1 1/2 tsp oil, and 1 tsp baking powder.
Also, did you know maraschino cherries get their flavor from almond extract? Seriously. When you come across almond extract, smell it. If you are not a fan, sub the almond for more vanilla.
Chocolate Brownie Cupcakes with Peanut Buttercream

Cupcakes
3/4 cup flour
1/2 cup cocoa powder
1 tsp baking powder
1/4 tsp salt
2/3 cup sugar
2/3 cup brown sugar
3/4 cup butter, melted and cooled slightly
1/2 tsp vanilla
1/2 tsp almond extract
3 eggs
2/3 cup chocolate chips
Peanut Buttercream
2 2/3 Tbsp peanut butter
1 1/2 cups powdered sugar
1/2 tsp vanilla
2-3 Tbsp milk
1. Preheat oven to 325F. Line muffin pan with paper liners.
2. Mix together flour, cocoa powder, baking powder, and salt.
3. In another bowl, beat together both sugars and butter until smooth. Beat in vanilla and almond extracts. Add eggs, one at a time, beating well after each addition. Add flour mixture, stirring by hand until combined. Stir in chocolate chips.
4. Scoop batter into prepared liners. Bake for 28 minutes or until a toothpick comes out with a few crumbs and a little melted chocolate. The tops will not spring back when touched. Let cool for 10 minutes in pan before removing to cooling rack.
5. Peanut Buttercream: Cream peanut butter until light and fluffy. Beat in sugar and vanilla. Add milk until desired consistency is achieved. Frost cooled cupcakes.
Both recipes make enough for 12 cupcakes without leftover frosting.
Sources: Cupcake, Frosting

Evil alien cat?

Don't know if you can tell, but Murray's eyes are closed.
I halved the recipe and got 6 cupcakes. The recipe below makes 12 cupcakes and without leftover frosting. To halve the 3 eggs, use 1 egg, 1 Tbsp water, 1 1/2 tsp oil, and 1 tsp baking powder.
Also, did you know maraschino cherries get their flavor from almond extract? Seriously. When you come across almond extract, smell it. If you are not a fan, sub the almond for more vanilla.
Chocolate Brownie Cupcakes with Peanut Buttercream
Cupcakes
3/4 cup flour
1/2 cup cocoa powder
1 tsp baking powder
1/4 tsp salt
2/3 cup sugar
2/3 cup brown sugar
3/4 cup butter, melted and cooled slightly
1/2 tsp vanilla
1/2 tsp almond extract
3 eggs
2/3 cup chocolate chips
Peanut Buttercream
2 2/3 Tbsp peanut butter
1 1/2 cups powdered sugar
1/2 tsp vanilla
2-3 Tbsp milk
1. Preheat oven to 325F. Line muffin pan with paper liners.
2. Mix together flour, cocoa powder, baking powder, and salt.
3. In another bowl, beat together both sugars and butter until smooth. Beat in vanilla and almond extracts. Add eggs, one at a time, beating well after each addition. Add flour mixture, stirring by hand until combined. Stir in chocolate chips.
4. Scoop batter into prepared liners. Bake for 28 minutes or until a toothpick comes out with a few crumbs and a little melted chocolate. The tops will not spring back when touched. Let cool for 10 minutes in pan before removing to cooling rack.
5. Peanut Buttercream: Cream peanut butter until light and fluffy. Beat in sugar and vanilla. Add milk until desired consistency is achieved. Frost cooled cupcakes.
Both recipes make enough for 12 cupcakes without leftover frosting.
Sources: Cupcake, Frosting
Evil alien cat?
Don't know if you can tell, but Murray's eyes are closed.
Tuesday, December 9, 2008
Tuesdays With Dorie - Grandma's All-Occasion Sugar Cookies
So this week's TwD was Dorie's Grandma's All-Occasion Sugar Cookies. This recipe is perfect for the holidays because who doesn't love using cute Christmas cookie cutters (try saying that fast!)? I used butter again because I had some to use. I can't believe some of you only use butter to bake! I would except margarine is much cheaper.

As my dad said, they're naked!!
Did it make a difference? They tasted like the sugar cookies I usually make with margarine. I found nothing special about Dorie's version, but next time I may play around with different flavorings, such as lemon zest.

Moose!! The only one without broken legs/feet/antlers
And it's probably obvious, but I am not a decorator haha I did have some help from my best friend.


I cannot figure out what shape the non-sprinkled one is...
Thanks to Ulrike of Kuchenlatein for picking a nice holiday cookie. You can find the recipe in Baking: From My Home To Yours on page 146-147 or on Ulrike's blog.
Saturday, December 6, 2008
Moosey Tip #3
Note to self: fresh spinach shrinks when cooked. A lot. My main dish turned into a side dish.
Also, I do not like rum. It made me waste my precious Coke because I couldn't stand the taste.
That is all.
Also, I do not like rum. It made me waste my precious Coke because I couldn't stand the taste.
That is all.
Tuesday, December 2, 2008
Tuesdays With Dorie - Linzer Sables
This is probably the first time I baked with real butter. I had it in my mind that you must use butter for all shortbread and sable recipes. Otherwise, it will not come out that great. Did anybody use margarine and still got great results?
Don't have linzer cookie cutters? No problem! Use a regular cookie cutter (round, flower, heart, whatever). Then with a toothpick, create small holes in the center of half the cookies. You may need to redo the holes after baking because if the dough is too warm, they will spread and make the hole smaller. For the nuts, Dorie offers a variety to use, so I used walnuts. They need to be finely ground, so use a food processor.

These cookies were amazing! I don't know if it was the butter or the "sandy" texture of the dough. I halved the recipe because there was too much junk in the house, but that was a bad idea. Even my mom kept asking for more (usually she hates my food). I used apricot filling (not jelly but that baker's dessert filling stuff). For the powdered sugar, I dipped the cookie tops into a small bowl before sandwiching together. I would suggest keeping these in a container because overnight, they got soft.
Linzer Sables

Thanks Noskos of Living the Life for picking awesome holiday cookies! You can find the recipe on pages 134-135 of Baking: From My Home To Yours or Noskos' blog.
Monday, December 1, 2008
Round 3 For Winning...
I'm still determined to win Marye's Hershey basket! Are you? Enter for a third time this week at Baking Delights.
Sunday, November 30, 2008
A Nice, Fluffy Dessert
I had leftover whipping cream from making pie, so I had to find a recipe that didn't leave me with extra egg whites. However, it did leave me with lots of chocolate mousse. One thing I don't like about this recipe is after you beat the cream, you beat the egg whites. You have to make sure to wash the beaters and make sure they are 100% dry. Otherwise, the eggs won't form soft peaks. I would say do the egg whites first, but then they would deflate by the time you finish the cream. Or at least that's my theory.
I think I need this to get me through this week. The week before finals is always killer for me because my professors love making projects due this week instead of during finals week. Why? Don't know. It's been like that all four years. And I have to clean out my freezer before winter break. I have salmon, swordfish, beef, ground beef, and chicken plus frozen vegetables and Hot Pockets. Not to mention leftovers from Thanksgiving. Usually, I'm low on food. This week I have too much to eat! haha
Chocolate Mousse

7 oz dark chocolate
5 Tbsp butter
4 eggs, separated
1 cup heavy whipping cream
2 Tbsp powdered sugar
1. Melt chocolate and butter together until smooth. Add one egg yolk at a time, beating until well combined. Set aside.
2. Whip cream until soft peaks form. Set aside.
3. Whip egg whites until soft peaks form. Add sugar; whip until mixture is thick and glossy (but still soft peaks).
4. Gently fold cream into chocolate mixture. Then fold in egg whites. Refrigerate at least three hours before serving.
Serves 6-8.
Source: Donna Hay's Modern Classics Book 2, 2003 p. 106
I think I need this to get me through this week. The week before finals is always killer for me because my professors love making projects due this week instead of during finals week. Why? Don't know. It's been like that all four years. And I have to clean out my freezer before winter break. I have salmon, swordfish, beef, ground beef, and chicken plus frozen vegetables and Hot Pockets. Not to mention leftovers from Thanksgiving. Usually, I'm low on food. This week I have too much to eat! haha
Chocolate Mousse
7 oz dark chocolate
5 Tbsp butter
4 eggs, separated
1 cup heavy whipping cream
2 Tbsp powdered sugar
1. Melt chocolate and butter together until smooth. Add one egg yolk at a time, beating until well combined. Set aside.
2. Whip cream until soft peaks form. Set aside.
3. Whip egg whites until soft peaks form. Add sugar; whip until mixture is thick and glossy (but still soft peaks).
4. Gently fold cream into chocolate mixture. Then fold in egg whites. Refrigerate at least three hours before serving.
Serves 6-8.
Source: Donna Hay's Modern Classics Book 2, 2003 p. 106
Saturday, November 29, 2008
Tuesdays Thanksgiving With Dorie
This week's recipe was perfect for Thanksgiving. If you can't decide between pumpkin or pecan pie, this pie allows you to have both. I've had my fair share of pumpkin pie, but I don't think I can recall ever having pecan pie. With this recipe, I think I expected more of a sugary topping. Although the pie was good, I didn't think it was THAT great.
Mine fell apart when cutting it, but it was fine after being refrigerated. It might have been the crust. My dad decided to buy premade pie crusts, so I used one of those.
Thanksgiving Twofer Pie

Thanks to Vibi of La Casserole Carree for choosing this pie so close to Thanksgiving. You can find the recipe here.
Monday, November 24, 2008
Round 2 For Winning...
Disappointed you didn't win the first Hershey's basket from Marye of Baking Delights? You still have three more baskets to win. Check out this week's drawing, now with four chances to win!!
Sunday, November 23, 2008
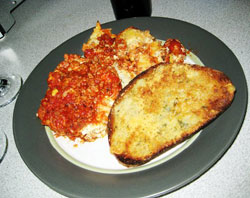
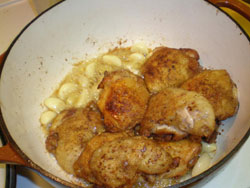
More Meat, Less Pasta
As a college student, I'm trying to make dinners that do not involve pasta or rice. Sure, there's nothing wrong with pasta or rice, but when you tend to eat it five times a week, it can be an unhealthy habit. This recipe for Buffalo Chicken Strips I have been making for quite some time. There are no measurements for it. You just see how much chicken you have and estimate how much hot sauce and breadcrumbs to put into each bowl. If you are not a fan of hot sauce, you can use ranch or bbq sauce. You can put spices into the breadcrumbs.
Buffalo Chicken Strips

Preheat oven to 375F. Line a cookie sheet with foil for easy clean-up. Cut chicken into thin strips. Fill one bowl with hot sauce and another bowl with breadcrumbs. Dip each strip into the sauce, then the breadcrumbs. Place onto sheet. Bake for 15-20 minutes or until no longer pink in the middle.
Source: Somewhere online?
Buffalo Chicken Strips
Preheat oven to 375F. Line a cookie sheet with foil for easy clean-up. Cut chicken into thin strips. Fill one bowl with hot sauce and another bowl with breadcrumbs. Dip each strip into the sauce, then the breadcrumbs. Place onto sheet. Bake for 15-20 minutes or until no longer pink in the middle.
Source: Somewhere online?
Saturday, November 22, 2008


Friday, November 21, 2008
My Favorite Cookies...Ever!!
Ok so I made these cookies back in October. I would have lied, but I think the Jack-o-Lantern mug gives it away haha
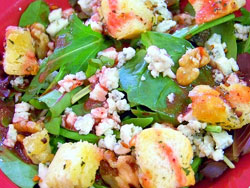
I remember growing up, the grocery store would have pumpkin raisin cookies with orange icing. These were my favorite, even more than chocolate chip cookies. They were always expensive, so when they were on reduced-sale for being a few days old, my dad would buy a couple dozen. They've stopped going on sale, so we stopped buying them. I tried making a similar recipe a few years ago, but it wasn't as good. This year, I was browsing Tastespotting (who I hate because they are way too picky), and I found a marvelous cookie picture from Dishing Up Delights. The ones I had growing up were Pumpkin Raisin Cookies, but I decided to use this recipe as a base and make one half chocolate chip, the other half raisin.

Left - chocolate chip. Right - raisin
I skipped the orange icing because one - they didn't need them and two - cut out extra calories and sugar. Every little bit counts, no? Also, don't forget the baking soda mixture! Normally, you would mix the baking soda in with the dry ingredients. However, it says to dissolve it in milk and set aside. I was halfway scooping the dough onto the cookie sheets when I saw the milk on the counter. Oops! I hurried up and stirred it in. Did it make a difference? No clue.
Pumpkin Chocolate Chip (or Raisin) Cookies

1 cup pumpkin
3/4 cup sugar
1/2 cup oil
1 egg, lightly beaten
2 cups flour
2 teaspoons baking powder
1 teaspoon cinnamon
1/2 teaspoon salt
1 teaspoon baking soda
1 teaspoon milk
1 cup chocolate chips (or 1/2 cup chips, 1/2 cup raisins)
1 teaspoon vanilla
1. Preheat the oven to 375F. Grease cookie sheets.
2. Dissolve baking soda in milk and set aside. In large bowl whisk together pumpkin, sugar, oil, vanilla, and egg.
3. In a small bowl, stir together the flour, baking powder, cinnamon, and salt. Add the dry ingredients to the pumpkin mixture and then. Stir in the baking soda mixture. Now is the time to split the dough in half if using both chocolate chips and raisins. Stir in chocolate chips and/or raisins. Spoon onto cookie sheets. Bake 12 to 15 minutes or until done.
Source: Dishing Up Delights
I remember growing up, the grocery store would have pumpkin raisin cookies with orange icing. These were my favorite, even more than chocolate chip cookies. They were always expensive, so when they were on reduced-sale for being a few days old, my dad would buy a couple dozen. They've stopped going on sale, so we stopped buying them. I tried making a similar recipe a few years ago, but it wasn't as good. This year, I was browsing Tastespotting (who I hate because they are way too picky), and I found a marvelous cookie picture from Dishing Up Delights. The ones I had growing up were Pumpkin Raisin Cookies, but I decided to use this recipe as a base and make one half chocolate chip, the other half raisin.
Left - chocolate chip. Right - raisin
I skipped the orange icing because one - they didn't need them and two - cut out extra calories and sugar. Every little bit counts, no? Also, don't forget the baking soda mixture! Normally, you would mix the baking soda in with the dry ingredients. However, it says to dissolve it in milk and set aside. I was halfway scooping the dough onto the cookie sheets when I saw the milk on the counter. Oops! I hurried up and stirred it in. Did it make a difference? No clue.
Pumpkin Chocolate Chip (or Raisin) Cookies
1 cup pumpkin
3/4 cup sugar
1/2 cup oil
1 egg, lightly beaten
2 cups flour
2 teaspoons baking powder
1 teaspoon cinnamon
1/2 teaspoon salt
1 teaspoon baking soda
1 teaspoon milk
1 cup chocolate chips (or 1/2 cup chips, 1/2 cup raisins)
1 teaspoon vanilla
1. Preheat the oven to 375F. Grease cookie sheets.
2. Dissolve baking soda in milk and set aside. In large bowl whisk together pumpkin, sugar, oil, vanilla, and egg.
3. In a small bowl, stir together the flour, baking powder, cinnamon, and salt. Add the dry ingredients to the pumpkin mixture and then. Stir in the baking soda mixture. Now is the time to split the dough in half if using both chocolate chips and raisins. Stir in chocolate chips and/or raisins. Spoon onto cookie sheets. Bake 12 to 15 minutes or until done.
Source: Dishing Up Delights
Thursday, November 20, 2008
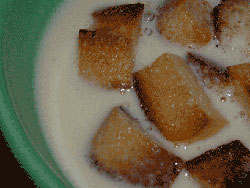
A Soup To Battle Winter
Snow is starting to hit good ol' Slippery Rock. Although not a lot of stayed on the ground, right now there is a thick flurry in the air. What better way to battle the cold than with a nice bowl of taco soup? And it's budget friendly and versatile. If you don't want meat, put in more veggies. If you love beans, put in a variety.
The one thing I may change next time is use beef (or vegetable) stock instead of plain water. Also, make sure you use a big enough skillet because I didn't have room to put in all the water. Oops haha
Taco Soup

1 lb. ground beef (I used maybe 1/4 lb.)
1 onion chopped (I just chopped until I had enough)
1 clove garlic, minced
3 cans (15 1/2 oz each) chili beans, undrained (I used 1 can black beans and rinsed them)
1 can (14 1/2 oz) tomatoes, undrained
1 can (14 1/2 oz) corn, undrained (I used frozen)
1 can (8 oz) tomato sauce
1 Tbsp chili powder
1 1/2 tsp cumin
1 tsp black pepper
1 tsp salt
1/2 tsp paprika
1/2 tsp dried oregano
1/4 tsp garlic powder
1/4 tsp onion powder
1/4 tsp crushed red pepper flakes
1 1/2 cups water
1 1/2 cups shredded cheddar cheese
1. Brown beef, garlic, and onion. Drain grease.
2. Add beans, tomatoes, corn, tomato sauce, spices, and water. Bring to a boil. Simmer on medium-low heat for 5 minutes, stirring occasionally. Pour into bowls and top with cheese.
Makes six servings.
Source: Kraft Food and Family, Holiday 08/Winter 09 p. 15
The one thing I may change next time is use beef (or vegetable) stock instead of plain water. Also, make sure you use a big enough skillet because I didn't have room to put in all the water. Oops haha
Taco Soup
1 lb. ground beef (I used maybe 1/4 lb.)
1 onion chopped (I just chopped until I had enough)
1 clove garlic, minced
3 cans (15 1/2 oz each) chili beans, undrained (I used 1 can black beans and rinsed them)
1 can (14 1/2 oz) tomatoes, undrained
1 can (14 1/2 oz) corn, undrained (I used frozen)
1 can (8 oz) tomato sauce
1 Tbsp chili powder
1 1/2 tsp cumin
1 tsp black pepper
1 tsp salt
1/2 tsp paprika
1/2 tsp dried oregano
1/4 tsp garlic powder
1/4 tsp onion powder
1/4 tsp crushed red pepper flakes
1 1/2 cups water
1 1/2 cups shredded cheddar cheese
1. Brown beef, garlic, and onion. Drain grease.
2. Add beans, tomatoes, corn, tomato sauce, spices, and water. Bring to a boil. Simmer on medium-low heat for 5 minutes, stirring occasionally. Pour into bowls and top with cheese.
Makes six servings.
Source: Kraft Food and Family, Holiday 08/Winter 09 p. 15
Wednesday, November 19, 2008
Win Chocolate!!
Name one person who wouldn't want to win a basket full of Hershey stuff. Check out Marye's blog for more details on how to win.
Also, you know you do too much school work when you actually dream about it. Seriously, I was dreaming I was editing video. How nerdy is that? haha
Also, you know you do too much school work when you actually dream about it. Seriously, I was dreaming I was editing video. How nerdy is that? haha
Thursday, November 13, 2008
I Hate Pittsburgh Sometimes...
Why is Pittsburgh so hard to navigate? This past weekend is the third time I got lost coming home. My dad told me when coming home, get on the Parkway. Parkway = 376, so I'm driving home, looking for the 376 sign. Nobody told me 376 turned into 279 on the way there, so technically I was looking for 279 which would later turn into 376. Ok so it was sorta outside the city. The second time I got lost, I was inside the city and couldn't figure out how to get back onto 376 because Pittsburgh does not post enough signs. And when I figured out I missed the turn, it took me about 10 minutes to make a U-turn because the city is not built like a grid. In other words, you can't go the next block down and turn around because you physically can't. Seriously, are other cities this complicated?
At least I was with my best friend, and she had Verizon Navigator. However, it does not work fast enough because we kept getting "Recalculating route...recalculating route...make the next legal U-turn." Thanks, Verizon, thanks. I somehow managed to get back home an entirely different way, all because I recognized Walgreens. That is the second time Walgreens saved me. The first time I got lost, I was coming home from my internship in Pittsburgh and took a detour because of construction on 376 (see a pattern here?). I was on the phone with my mom for directions because it was unexpected. She told me to go straight, but she failed to tell me there was a Y in the road and I should yield right then go straight. I somehow made it to an intersection with (a different) Walgreens and knew how to get home.
Moral of the story - pack these no-bake cookies because you will get lost coming home from Pittsburgh. You can't go wrong with chocolate and peanut butter! haha
No-Bake Cookies

2 2/3 cups sugar
2/3 cup milk
1/3 cup cocoa
5 1/3 Tbsp margarine
3/4 cup creamy peanut butter
1/2 teaspoon vanilla
3 1/2 cups quick oats
Mix sugar, milk, cocoa, and margarine. Bring to a boil; boil 1 minute. Remove from heat and add vanilla and peanut butter. Stir in oats. Drop by spoonfuls onto cookie sheets lined with wax paper. Freeze or refrigerate for about 30 minutes or until firm.
Makes 3 dozen.
Source: Recipe Zaar
At least I was with my best friend, and she had Verizon Navigator. However, it does not work fast enough because we kept getting "Recalculating route...recalculating route...make the next legal U-turn." Thanks, Verizon, thanks. I somehow managed to get back home an entirely different way, all because I recognized Walgreens. That is the second time Walgreens saved me. The first time I got lost, I was coming home from my internship in Pittsburgh and took a detour because of construction on 376 (see a pattern here?). I was on the phone with my mom for directions because it was unexpected. She told me to go straight, but she failed to tell me there was a Y in the road and I should yield right then go straight. I somehow made it to an intersection with (a different) Walgreens and knew how to get home.
Moral of the story - pack these no-bake cookies because you will get lost coming home from Pittsburgh. You can't go wrong with chocolate and peanut butter! haha
No-Bake Cookies
2 2/3 cups sugar
2/3 cup milk
1/3 cup cocoa
5 1/3 Tbsp margarine
3/4 cup creamy peanut butter
1/2 teaspoon vanilla
3 1/2 cups quick oats
Mix sugar, milk, cocoa, and margarine. Bring to a boil; boil 1 minute. Remove from heat and add vanilla and peanut butter. Stir in oats. Drop by spoonfuls onto cookie sheets lined with wax paper. Freeze or refrigerate for about 30 minutes or until firm.
Makes 3 dozen.
Source: Recipe Zaar
Wednesday, November 5, 2008
Liars Do Not Win
Did you know Michael Symon took over as host for Dinner: Impossible because Robert Irvine "exaggerated" about his credentials? Wow, and I loved Robert too.
Read the article here.
Read the article here.
Tuesday, November 4, 2008
A Filling Breakfast
Yet another recipe I made back in October with my apples. This breakfast is time consuming because you have to brown the sausage, then shred the apples, then make the syrup and pancakes. I guess you could save time by having already-browned sausage, but you don't want to prepare the apples until you are ready to use them. I was impressed by the syrup. Normally, I don't eat toppings with my pancakes. This syrup, although optional, tastes good.
And today is the last day I register for classes, ever. None of them sound fun except maybe oceanography because we are going to the Bahamas for spring break. No video classes though because I took them all already :(
Yes, I voted. Stop asking me haha
Apple Sausage Pancakes with Cider Syrup

1/2 lb. bulk pork sausage
2/3 cup flour
2 Tbsp sugar
1 1/2 tsp baking powder
1/8 tsp salt
1/2 tsp cinnamon
1 egg
1/2 cup milk
2 Tbsp oil
1/2 cup shredded, peeled apples
Syrup
1/4 cup sugar
1 1/2 tsp cornstarch
1/4 tsp cinnamon
1/8 tsp nutmeg
1/8 tsp cloves
1/2 cup apple cider
1 1/2 tsp lemon juice
1 Tbsp butter
1. In a skillet, cook sausage until no longer pink. Drain grease and set aside.
2. In a bowl, combine flour, sugar, baking powder, salt, and cinnamon. Beat in egg, milk, and oil until just moistened. Fold in apples and sausage. Pour batter by 1/4 cupfuls into hot skillet or griddle. When the top bubbles and the bottom is brown, flip and cook until bottom is brown. Repeat until batter is gone.
3. Meanwhile, for syrup: combine sugar, cornstarch, and spices in a small saucepan. Gradually stir in cider and lemon juice until smooth. Bring to a boil and stir for 2 minutes or until thickened. Remove from heat and stir in butter until melted. Serve warm with pancakes.
Makes 12 pancakes.
Source: Taste of Home's Quick Cooking Magazine, Sept./Oct. 2001 p. 12
And today is the last day I register for classes, ever. None of them sound fun except maybe oceanography because we are going to the Bahamas for spring break. No video classes though because I took them all already :(
Yes, I voted. Stop asking me haha
Apple Sausage Pancakes with Cider Syrup
1/2 lb. bulk pork sausage
2/3 cup flour
2 Tbsp sugar
1 1/2 tsp baking powder
1/8 tsp salt
1/2 tsp cinnamon
1 egg
1/2 cup milk
2 Tbsp oil
1/2 cup shredded, peeled apples
Syrup
1/4 cup sugar
1 1/2 tsp cornstarch
1/4 tsp cinnamon
1/8 tsp nutmeg
1/8 tsp cloves
1/2 cup apple cider
1 1/2 tsp lemon juice
1 Tbsp butter
1. In a skillet, cook sausage until no longer pink. Drain grease and set aside.
2. In a bowl, combine flour, sugar, baking powder, salt, and cinnamon. Beat in egg, milk, and oil until just moistened. Fold in apples and sausage. Pour batter by 1/4 cupfuls into hot skillet or griddle. When the top bubbles and the bottom is brown, flip and cook until bottom is brown. Repeat until batter is gone.
3. Meanwhile, for syrup: combine sugar, cornstarch, and spices in a small saucepan. Gradually stir in cider and lemon juice until smooth. Bring to a boil and stir for 2 minutes or until thickened. Remove from heat and stir in butter until melted. Serve warm with pancakes.
Makes 12 pancakes.
Source: Taste of Home's Quick Cooking Magazine, Sept./Oct. 2001 p. 12
Monday, November 3, 2008
If Only I Had A Slice Now
Ok so really I baked this pie back in October after I went to an apple festival, but I love this picture so much, I couldn't let it sit on my laptop any longer. I used Roma apples, which are delicious on their own. This is considered French Apple Pie because there is a topping rather than another crust on top. I'm getting better at making homemade crusts. Now if I can just make it a circle so it actually fits the plate haha
French Apple Pie

Pastry for 1 crust pie
6 apples, peeled, cored, and slices (mine were more cubed than sliced)
2 Tbsp sugar
2 Tbsp flour
1/8 tsp salt
1/2 tsp lemon zest
2 tsp lemon juice
1/4 tsp nutmeg
1/2 tsp cinnamon
1 Tbsp butter
Topping
1/2 cup brown sugar
1/4 cup butter
1/3 cup flour
1/4 tsp cinnamon
1. Preheat oven to 425. Place pie crust into 9-inch pie plate.
2. Combine sugar, flour, salt, zest, nutmeg, and cinnamon. Place half of apples in pie shell. Squeeze 1 Tbsp juice on top. Top with half of sugar mixture. Arrange the rest of the apples on top. Repeat with juice and sugar mixture. Dot with butter.
3. Blend together topping ingredients with fork until crumbly. Sprinkle over pie. Cover with foil and bake 20 minutes. Uncover and bake another 20 minutes.
Makes 1 pie.
Source: Long Grove Apple Haus Apple Cookbook, 1976 p.61
French Apple Pie
Pastry for 1 crust pie
6 apples, peeled, cored, and slices (mine were more cubed than sliced)
2 Tbsp sugar
2 Tbsp flour
1/8 tsp salt
1/2 tsp lemon zest
2 tsp lemon juice
1/4 tsp nutmeg
1/2 tsp cinnamon
1 Tbsp butter
Topping
1/2 cup brown sugar
1/4 cup butter
1/3 cup flour
1/4 tsp cinnamon
1. Preheat oven to 425. Place pie crust into 9-inch pie plate.
2. Combine sugar, flour, salt, zest, nutmeg, and cinnamon. Place half of apples in pie shell. Squeeze 1 Tbsp juice on top. Top with half of sugar mixture. Arrange the rest of the apples on top. Repeat with juice and sugar mixture. Dot with butter.
3. Blend together topping ingredients with fork until crumbly. Sprinkle over pie. Cover with foil and bake 20 minutes. Uncover and bake another 20 minutes.
Makes 1 pie.
Source: Long Grove Apple Haus Apple Cookbook, 1976 p.61
Sunday, November 2, 2008
You Never Would Have Guessed...
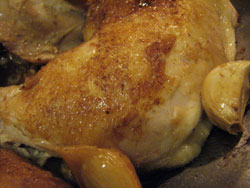
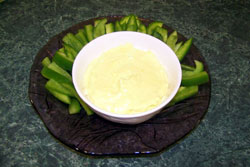
I never realized this before until last Monday. It was the second day of me being sick, and I'm starving. Yet, I didn't feel like eating. So I'm laying on my bed, watching my tape of various Food Network shows I have taped. Then all of a sudden, I decided to make mashed potatoes two hours before work. I checked my potatoes. Two were rotten, two were not. Just to be safe, I peeled the non-rotten potatoes because although I examined the skins over and over, I didn't want to take a chance. Normally, I would've thrown them out because they were touching the rotten ones, but you don't understand. I had barely any food in the apartment for me to eat while sick.
Anyway, what I never realized was I had never made mashed potatoes before. My friend asked, never with your parents growing up? Nope, they made those packets where you add water/milk/whatever it calls for. I don't even understand it myself. I do not get my food passion from my parents. They never influenced me (except maybe to flavor my meats more!) They are the reason why I hate meatloaf and pork chops. Our palettes are so different. I get my eat-anything gene from my dad, but even then I eat some things he doesn't like, like catfish or curry. My mom pretty much hates everything I cook because she doesn't like strong flavors. My brother is picky too, but not as bad as my mom. As far as baking, my mom bakes from a box. My dad does make pie or anchovy balls (yes, we love anchovies!), but he buys pre-made crust or pre-made crescent dough. So how did I learn to cook? I've taken three cooking classes throughout middle and high school, but even then most of the stuff I know I taught myself via recipes or blogs. I did grow up admiring pictures (mainly desserts) in my mom's magazines, like Family Circle or Woman's Day.
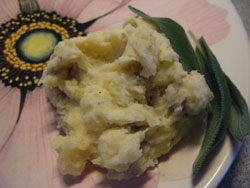
So back to my mashed potatoes. I looked up a recipe on Recipe Zaar. I found one that was so good, it doesn't need gravy. Good, because I had no clue on how to make gravy haha
Mashed Potatoes

2 baking potatoes, cleaned (peeling is optional)
3 garlic cloves, peeled
1/4 cup milk
2 Tbsp parmesan cheese, grated
2 Tbsp butter
1 Tbsp dried parsley
Salt and pepper
1. Cut potatoes into cubes. Boil potatoes and whole garlic cloves. Let simmer for 20 minutes. Drain and put into a mixing bowl.
2. Add milk, cheese, butter, parsley, salt and pepper. Either mash by hand or with a mixer until smooth.
Makes 2-4 servings.
Source: Recipe Zaar
Anyway, what I never realized was I had never made mashed potatoes before. My friend asked, never with your parents growing up? Nope, they made those packets where you add water/milk/whatever it calls for. I don't even understand it myself. I do not get my food passion from my parents. They never influenced me (except maybe to flavor my meats more!) They are the reason why I hate meatloaf and pork chops. Our palettes are so different. I get my eat-anything gene from my dad, but even then I eat some things he doesn't like, like catfish or curry. My mom pretty much hates everything I cook because she doesn't like strong flavors. My brother is picky too, but not as bad as my mom. As far as baking, my mom bakes from a box. My dad does make pie or anchovy balls (yes, we love anchovies!), but he buys pre-made crust or pre-made crescent dough. So how did I learn to cook? I've taken three cooking classes throughout middle and high school, but even then most of the stuff I know I taught myself via recipes or blogs. I did grow up admiring pictures (mainly desserts) in my mom's magazines, like Family Circle or Woman's Day.
So back to my mashed potatoes. I looked up a recipe on Recipe Zaar. I found one that was so good, it doesn't need gravy. Good, because I had no clue on how to make gravy haha
Mashed Potatoes
2 baking potatoes, cleaned (peeling is optional)
3 garlic cloves, peeled
1/4 cup milk
2 Tbsp parmesan cheese, grated
2 Tbsp butter
1 Tbsp dried parsley
Salt and pepper
1. Cut potatoes into cubes. Boil potatoes and whole garlic cloves. Let simmer for 20 minutes. Drain and put into a mixing bowl.
2. Add milk, cheese, butter, parsley, salt and pepper. Either mash by hand or with a mixer until smooth.
Makes 2-4 servings.
Source: Recipe Zaar
Thursday, October 30, 2008
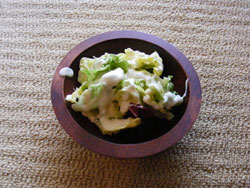
My New Toy!
Ok so it's not really a toy because it's ceramic, but I've been eyeing this baby since the end of last semester at the bookstore.

I was at the bookstore today, and it was the last one. I decided to break down and spend the $10. However, I noticed a slight chip on the base, so I figured might as well ask for a discount. I know when I worked at the mall in a clothing store, we would give 10% off for damages with no return or exchange. When I asked, she said they didn't sell damaged merchandise. I was like, no I'll still buy it because I thought she meant she couldn't sell it to me at all.

Really she just meant she couldn't sell it and gave it to me as a gift. !!! I asked her probably about three times are you sure? and thanked her another twenty times. So here's my new toy! I have yet to decide what to put in it. And I am still cursing the person who designed our apartment. The lighting is absolutely horrible. Who puts the main light on the side wall instead of the ceiling anyway? I brought my lamp over and did the best I could, hence the horrible shadow.
I was at the bookstore today, and it was the last one. I decided to break down and spend the $10. However, I noticed a slight chip on the base, so I figured might as well ask for a discount. I know when I worked at the mall in a clothing store, we would give 10% off for damages with no return or exchange. When I asked, she said they didn't sell damaged merchandise. I was like, no I'll still buy it because I thought she meant she couldn't sell it to me at all.
Really she just meant she couldn't sell it and gave it to me as a gift. !!! I asked her probably about three times are you sure? and thanked her another twenty times. So here's my new toy! I have yet to decide what to put in it. And I am still cursing the person who designed our apartment. The lighting is absolutely horrible. Who puts the main light on the side wall instead of the ceiling anyway? I brought my lamp over and did the best I could, hence the horrible shadow.
Wednesday, October 29, 2008
My Favorite Vegetable
One reason I love fall is the abundance of winter squash. Butternut squash is my favorite, although since I recently began cooking with spaghetti squash, it may have a tough time staying number one.
I've been sick since Sunday, so here's a soup I made. People are surprised I still have the energy to cook. I enjoy it so much, it's more fun than work. Plus I have nobody to take care of me, so if I want to eat, I have to suck it up and cook.
Even if I wasn't sick, I still would've made this soup because I had to use up my squash. I'm entering this in Weekend Cookbook Challenge 33 - Fall Vegetables. This soup made six servings, so I froze the leftovers for later.
Curried Winter Squash Bisque

2 lb. butternut squash
2 Tbsp butter
1 whole scallion, chopped
1 clove garlic, minced
1 small green pepper, chopped (I didn't have any)
1 tsp dried parsley or basil (or both??)
1 can (14 oz) diced tomatoes
4 cups chicken broth
Pinch of nutmeg
2 tsp curry powder
Salt and pepper
1. Preheat oven to 350F. Cut squash in half. If you are having trouble, put it in boiling water for a few minutes to soften the skin. Remove seeds and save them for later. Place cut side down onto a cookie sheet and bake for about 45 minutes. Once cool enough to handle, peel and cut into cubes.
2. Melt butter over medium-low heat. Saute scallion, garlic, and green pepper for 5 minutes. Add squash cubes, tomatoes, broth, and spices. Heat to boiling, then reduce heat for a few minutes.
3. In small batches (because hot liquid will expand and cause the lid to blow off), puree in a blender. Have another saucepan ready so you can pour the pureed soup into it. Once completely done, stir in curry powder. Heat to boiling again, then reduce heat and simmer for 10 minutes before serving.
Makes six bowls.
Source: Greene on Greens 1984, p. 334-335
Tuesday, October 28, 2008
Tuesdays With Dorie - Chocolate Chocolate Cupcakes

This week's recipe was cleverly chosen by Clara of I Heart Food 4 Thought. She suggested we could decorate these cupcakes for Halloween, so I did.
However, these weren't made without...complications. Roommate E decided she was going to take the electric hand mixer to her boyfriend's place to make sugar cookies. I didn't realize this until after measuring the dry ingredients, so I couldn't just pack up and wait another day. Fortunately, and I have no clue why, we had a hand-crank mixer. Thank you, Roommate B1! It is hard to use while creaming the butter, mainly because the bowl wouldn't stay still. Roommate B2 wanted to help, but we both agreed she wasn't allowed in the kitchen until her test results for mono came back (they came back yesterday, and she does not have mono. Good because I caught whatever she had, fortunately the day after baking).
Then when I went to prepare the buttermilk, I discovered my lemon went bad. I only have red wine vinegar, so I decided to use regular milk. A lot of TwDers complained their cupcakes were rather dry. Mine were very moist. I even baked them at the max amount of time.
As for the ganache on top, it was good. Visually, I didn't like the chocolate-on-chocolate because I like color contrast. The orange sprinkles did help a bit. Tastewise, my roommates ate about half, and I gave the rest to whoever was in the computer lab when I was working. My friend demanded I make him just one of these cupcakes for his birthday in two weeks. I'll probably just cut the recipe in half and make him six. I'm sure he can give the other five away no problem.
Chocolate-Chocolate Cupcakes

You can check out the recipe in Baking: From My Home To Yours on pages 215-217 or on Clara's blog. Thanks for picking this week's recipe!
Saturday, October 25, 2008
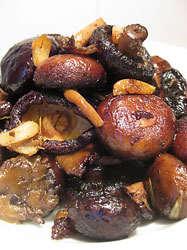
Just As Good As Spaghetti Without The Carbs
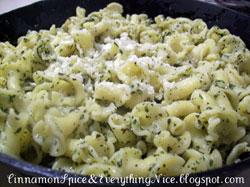
My favorite vegetable would probably have to be squash - yellow squash, zucchini, pumpkin, butternut, and spaghetti squash. I'm not so crazy about acorn squash, but it might have been the way I prepared it. Anyway, since I'm in college, I tend to eat a lot of pasta and rice. Although I'm not carb conscious, I do realize eating too much is bad. One solution is to pretend you are eating pasta when really it's just spaghetti squash. I never understood this vegetable until I cooked it for the first time. For some reason, I thought the strands would be too hard to scrape. Honestly, it's probably the easiest thing to do. Much easier than cutting the raw vegetable in half haha
Tip: If you are having difficulty cutting winter squash in half, boil it for three minutes to slightly soften the skin. Your knife and arm will thank you!
Also don't throw away those seeds! You can easily roast them for a tasty snack. If you are skeptical, think pumpkin seeds. After all, pumpkin is a squash.
Spaghetti Squash
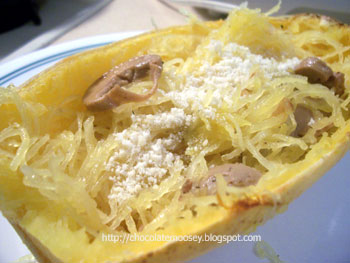
Preheat oven to 375F. Cut squash in half. Scrape out seeds; reserve. Place each half cut-side down on a cookie sheet. Bake for about an hour or until tender. Let cool until touchable. Using a fork, scrape out the fibers into thin strands and place in a bowl. Toss with your favorite pasta sauce. I used butter, garlic, onions, mushrooms, and parmesan cheese.
Roasted Seeds
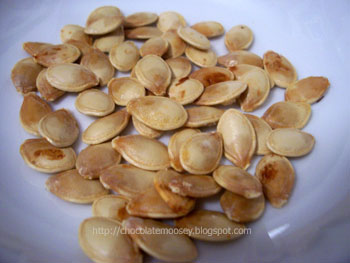
Preheat oven to 350F. Separate seeds from any squash remains as best as you can. Rinse thoroughly and pat dry. Toss with a bit of oil and seasoning (I used garlic salt). Spread the seeds onto a cookie sheet. For every five minutes in the oven, check on seeds and move them around with a spoon to prevent burning. Keep doing this until brown, about 20-30 minutes. Remove and let cool before snacking.
Friday, October 24, 2008
Random Seven Facts
Adam of Baking With Dynamite tagged me to list seven facts about me, so here goes.
The rules of the tag are:
(a) List these rules on your blog.
(b) Share 7 facts about yourself on your blog.
(c) Tag 7 people at the end of your post by leaving their names as well as links to their blogs.
1. I eat way too much pasta because I'm in college.
2. I love heights, especially when I'm taking pictures.
3. I have a low sense of smell, so when my roommates complain about the trash smelling, I honestly cannot smell it.
4. I am, and always will be, homesick for Ireland. (Note: I studied abroad there Spring 2007).
5. If it wasn't so late in my college education, I might have considered geology because they travel a lot.
6. I hate fully-cooked egg yolks. That means no scrambled eggs, no yolks from hard-boiled eggs. I only like runny yolks, like over-easy or sunny-side up eggs. Poached eggs are iffy because sometimes the yolk gets a little too cooked.
7. Communication majors are hard-working students too! Just because we don't have a million lab reports, research papers, huge exams, etc. doesn't mean our major is "easy." We spend most of our time working on projects rather than papers. When we do have papers, it is hardcore. I can't tell you how much time I've spent last week working on communication law or last year on research methods. If you got rid of our major, you wouldn't have a tv station, radio station, or a newspaper.
Ok, so now I am tagging the following people:
Megan from Megan's Cookin
Michele from Alwayz Bakin
Steph from Obsessed With Baking
Reeni from Cinnamon Spice and Everything Nice
Linda from Cooking in Cleveland
Anj from Gulf Coast Gram
Lauren from I'll Eat You
Tuesday, October 21, 2008
Tuesdays With Dorie - Pumpkin Muffins
I'm so glad I did this week's recipe when I was home for fall break a few weeks ago. I have been running around last week studying for my communication law midterm, writing comm. law essays, taping Homecoming events, and preparing for my presentation at a conference this past weekend. That's just the life of a student, no? So this week's recipe was Dorie's Pumpkin Muffins. Last week I mentioned buying fresh whole wheat flour. I decided to sub half of the all-purpose flour with whole wheat. You don't want to sub all of the flour because the muffins would become too dense unless you adjusted the liquid ingredients as well. I thought they turned out ok. I didn't top them with sunflower seeds because I didn't have any, so I just threw raisins in the batter.
Pumpkin Muffins
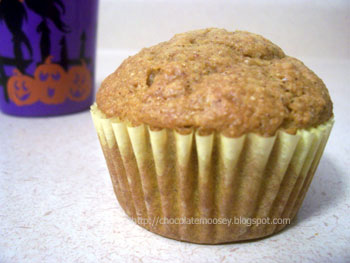
Thanks Kelly from Sounding My Barbaric Gulp for picking this week's recipe! They make a great breakfast snack. You can find the recipe on page 13 of Baking: From My Home To Yours or on Kelly's blog.
Monday, October 20, 2008
Please Go Visit
Please go visit my adopted blogger Lauren at I'll Eat You. Not only is she awesome, she is giving away Martha Stewart's Cookies book for her 100th post celebration.
Wednesday, October 15, 2008
Foodbuzz Publisher Community Launches
As you know, I am a featured publisher over at Foodbuzz. I'm helping to announce the official launch of the Foodbuzz Publisher Community. There is one paragraph from the press release that will help sum up what Foodbuzz is all about:
"Foodbuzz is the only online community with content created exclusively by food bloggers and rated by foodies. The site offers more than 20,000 pieces of new food and dining content weekly, including recipes, photos, blog posts, videos and restaurant reviews. Members decide the “tastiness” of each piece of content by voting and “buzz” the most popular posts to the top of the daily menu of submissions. Foodbuzz currently logs over 13 million monthly page views and over three million monthly unique visitors."
Foodbuzz has been so kind to me, helping me earn a little extra cash and giving away free goodies. Thank you for the apron and spatula I received a few weeks ago! They have also given me a cool tote bag and business cards.
If you are interested in becoming a featured publisher, please email me at mooseymoosecc(at)hotmail(dot)com. I will send you more information (plus I get a little bonus for referring people).
Tuesday, October 14, 2008
Tuesdays With Dorie - Lenox Biscotti
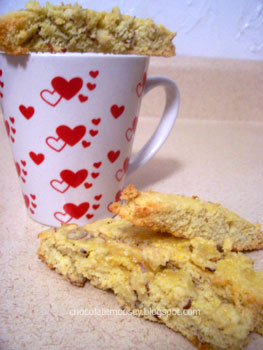
This week's recipe is Dorie's Lenox Biscotti. I have never made biscotti before, even though I am mainly Italian (gasp!). This recipe differs from other biscotti recipes because it calls for cornmeal. Whenever I went to the apple festival two weekends ago, I got really excited when I saw freshly-made cornmeal and flour for $1 each bag. I bought cornmeal and whole wheat flour, which is weird because I'm not a fan of wheat bread. They also had bran and flax seed, but I had no idea what I would do with them. I'm such a dork because only I would get excited over fresh flour. The farm has been doing this every year for how many years now, and this time I actually noticed. Probably because I haven't been observant of ingredients before.
A tip I never knew. You want to freeze flour to kill off any bugs. Also, flour tends to go rancid quickly, so freezing slows that process down by a few months. You could use the refrigerator too. Most families don't freeze flour because they go through all-purpose flour rather quickly. Just make sure you use air-tight bags or containers to keep moisture out.
Anyway, back to the biscotti. Dorie says to make the logs 12 x 1.5 inches, which make seem really skinny, but trust me. I didn't understand the dimensions either until after they were done baking because they spread ridiculously. Then she said to stand them up like a marching band after cutting for the second baking. Several TwDers were confused, and some of theirs wouldn't even stand up. Mine stood up just fine. If you are confused, Dorie means to stand them up so the cut sides are exposed. Mine came out fine, softer than the average biscotti, which my dad loved. He hates the really crunchy kind, but biscotti stands for twice baked and is meant to dip in a hot beverage. Some TwDers were saying they had to bake theirs longer, so maybe that's why mine came out soft. Some of them did fall apart but for the most part they held together. Try to bake only one tray at a time because I baked two trays, and the bottom tray cookies got burnt while the top tray was fine.
I made the lemon almond version. Since I only had one lemon and Dorie calls for two, the lemon taste was more of a backdrop while the almond, particularly the almond extract, was in your face. I highly recommend using two lemons.
I can now scratch this off of my challenge list.
Lenox Biscotti
Thanks Gretchen from Canela & Comino for picking this week's recipe! You can find the recipe on page 141-143 in Baking: From My Home To Yours or on Gretchen's blog.
Sunday, October 12, 2008
Moosey Tip #2
This tip applies more towards living with roommates than with your family. For any groceries and/or bathroom supplies you and your roommate(s) share, put a shopping list on the fridge. If you are like my roommates and I and have a cabinet for personal food, tape a piece of paper on the inside of your door so when you run out of something, you have one easy place to keep track.
Tuesday, October 7, 2008
Tuesdays With Dorie - Caramel Peanut Topped Brownie Cake
I was really excited when this week's recipe was Caramel Peanut Topped Brownie Cake because that was one of the recipes where the picture was making me drool. Unfortunately, I wasn't too crazy about it while eating. My family liked it, so I think it was my tastebuds rather than the actual baking.
EDIT - Ok I just ate a slice from the fridge. A lot better than my first tasting. Plus I think it's the cake part I didn't like, not the topping. I'm eating the topping alone and yummy! Maybe it's the chocolate I used. I did use cheap chocolate because I can't afford better haha
A few words of caution. One, this cake rises like no other, so be careful if you are making smaller portions like cupcakes. I used a 9-inch round cake pan, and it was as full as you can get. Two, making caramel sauce is dangerous and tricky. I burnt my finger about a year ago, and the mark was there for about a month. The temperature of the syrup is hotter than boiling water, and it sticks to your finger, so that few seconds from contact to wiping it off really makes it hurt worse than boiling water. Also, caramel sauce burns fast if you aren't watchful. Dorie suggests 5-10 minutes. A lot of TwDers, including myself, found it to be 15 minutes. You want the color to be a few shades lighter than a deep amber when you turn the heat down because it continues cooking and will go from deep amber to burnt in about 30 seconds. Trust me. I had to make the sauce twice because it burnt the first time. And burnt caramel smells.
This past weekend plus yesterday and today is my school's fall break. I've been baking almost non-stop plus I went to an apple festival Saturday afternoon. This cake is one of the many items I baked and also gave away to my best friend's grandparents (since I don't have grandparents of my own).
Caramel Topped Peanut Brownie Cake
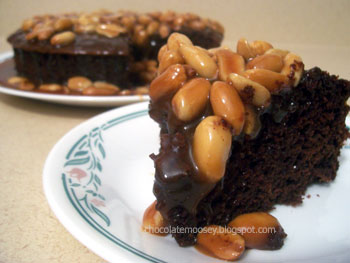
Thanks Tammy from Wee Treats by Tammy for choosing this week's recipe! You can find it on pages 264-265 of Baking: From My Home To Yours or visit Tammy's blog.
Monday, October 6, 2008
Weekend Cookbook Challenge Garlic Round-Up
Ok seriously, as I write this entry, my cat Murray is biting my butt. I guess the snap on my back pocket is very shiny. So please bear with me as I post the round-up because this isn't very comfortable haha

Acting like he did nothing by taking a bath
Thanks to everyone who participated in the Weekend Cookbook Challenge this month! I'm sure everyone's kitchen kept the vampires away. Let's see what's on the menu.
Cynthia from Diary of a Glad Housewife recommends making your kid do the mashing while making Garlic Chived Mashed Potatoes.
Judy from Judy's Gross Eats lives near Gilroy, CA, the garlic capital of the world, so she just had to enter her Creamy Garlic Soup.

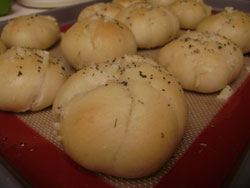
Clara from I Heart Food 4 Thought baked delicious buttery garlic knots. I, too, love the smell of garlic on my finger tips.
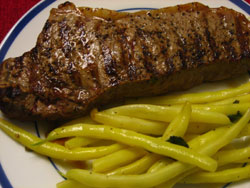
Ruth from Once Upon A Feast's entry may look like an ordinary steak, but the buttery garlic flavor kicks through with every bite. Check it out!
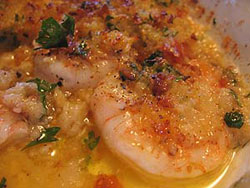
My mentee Lauren from I'll Eat You used pan roasting to highlight her garlic with Pollo All'Aglio.
Virginia from Living the Local Life made her lasagna extra special by adding slices of roasted garlic bread.
Lisa from Lady Concierge was the only one to enter Chicken with 40 Cloves of Garlic because everyone else assumed that would have been the most popular recipe to enter.
Thanks to everyone who participated! Hopefully your social life wasn't impacted too greatly by this wonderful ingredient. You can check out my entry for Steak with Roasted Garlic and Chili Rub. Thanks Sara for creating Weekend Cookbook Challenge! I'll be sure to host again in the future :)
Subscribe to:
Posts (Atom)