Sunday, August 26, 2007

Skip The Deep Fryer

I actually made these before I made the pie and stuffed shells. I just never got around to posting about my wonderful french fry making. I googled several recipes for baked french fries and put the results together. Honestly, I don't remember where I got the recipes from, so there's no definite source for this recipe. I experimented with baking them. Most of the recipes said to spray the cookie sheets. I did that for one tray. It just made the french fries A LOT darker on the bottom, but really no texture difference. Then all of the recipes said to cover the fries themselves in oil and seasonings before placing on the cookie sheets. Now, I wasn't sure if the oil was there to help the french fries bake or if it was to keep the salt on, so I did two batches. Personally, I think dipping in the oil makes them a little more crispier.


Baked French Fries


Potatoes
Oil
Seasonings

1. Preheat oven to 400F.

2. Peel potatoes if desired. Place in boiling water for three minutes so they are easier to cut. Drain; let cool enough to handle. Cut using either a french fry cutter (which I did) or make even chunks with a knife. Once cut, place in a bowl of cold water to help remove more starch.

3. Put some oil into a bowl large enough to dip french fries. Roll each french fry into the oil; sprinkle with desired seasonings.

4. Place fries onto an ungreased cookie sheet(s). Bake for 15-20 minutes. If you care about presentation, flip fries over throughout the cooking time to ensure browning on all sides. Serve with your favorite dipping sauce.

Source: Unknown

I'm trying to think of ways to get more people to comment. I saw this idea on a blog, so I'm going to try it out for now. What I do is ask a question each time I blog. Sounds simple, no? Here goes:

What do you like to use as dip for your French fries?
I like to use ranch dressing and ketchup (not at the same time though). However, when I'm at Wendy's, I so use a Frosty as a dip.

Tuesday, August 21, 2007

A Good Way To Eat Your Greens

In order to spark more interest in the LJ community, Arty Chokes is holding a recipe contest. What you need to do is prepare and submit a vegetarian recipe using mainly greens. I knew I had jumbo shells, frozen broccoli, and a block of cheese in the house. What does that get me? Broccoli and Cheese Stuffed Shells!!! Probably not my best recipe because it was dry due to the cheese. Plus I'm not a huge cheese fan. Also, don't always trust the first recipe you get online. I got a cheese sauce recipe from Recipe Zaar where you add the cheese first then the other ingredients. Big no-no. Luckily, I had milk and a giant chunk of melted cheese in the pan, so I used a colander and poured the milk into another saucepan. Then I googled and found several recipes with the same steps. Here you added the cheese last. That Recipe Zaar person got a bad review on her/his recipe.


Broccoli and Cheese Stuffed Shells


12 jumbo shells
3 Tbsp butter
3 Tbsp flour
1 1/2 cups milk
8 oz cheddar cheese, cubed
8 oz frozen chopped broccoli, thawed
1 tsp garlic, minced
Desirable spices, such as black pepper, chili powder, etc.
1/4 cup breadcrumbs

1. Boil water for shells; cook for 10 minutes. Drain and run under cold water. The cold water will keep them from cooking further. This is important because you will be baking the shells later.

2. Preheat oven to 350F. Melt butter in a saucepan. Add flour; stir. Gradually add milk. Add a few cubes of cheese at a time until fully melted. Stir in broccoli, garlic, and spices. Remove from heat.

3. Assemble shells in the bottom of a 13x9 pan. Fill each shell with cheese mixture. If you have any leftover cheese mixture, fill the gaps between the shells. Sprinkle breadcrumbs on each shell.

4. Cover with foil and bake for 35 minutes.

*If you want your broccoli to be soft, cook for a few minutes before stirring into the cheese sauce. Otherwise, they will be hot and crunchy in the shells (the way I like it).

You can also add various veggies to the broccoli - red pepper, carrots, zucchini, etc.

Source: Me! (Cheese sauce - don't remember)

Monday, August 20, 2007

A Challenging Pie

You must have patience when it comes to making Coconut Cream Pie. If you rush the filling, it will become super runny. I was doing fine with the filling until I burnt it. I was trying to clean out the one cabinet so I could pack for college. Apparently you have to stir it quite often; otherwise it will burn on the bottom. Since I burnt it, I poured what I could into a new pan (which was most of it). Since I didn't want to burn it a second time, I let it get bubbly and then turned it off. It took about 15-20 minutes. It wasn't as thick as it called for, so next time I'll let it go maybe another 5 minutes. As a result, the pie filling was super runny. The meringue acts as an insulator, so the filling does not cook anymore when you toast the meringue.

You can easily make Banana Cream Pie with this recipe. Omit the coconut and put sliced bananas in the bottom of the pie before adding the filling.

I already had plans for this pie before I joined Chefs Like Me. When I saw the challenge this week was pie, I thought the timing couldn't be better.


Coconut Cream Pie


9 inch pie crust (mine was pre-made but homemade works too)
1 1/2 cups sugar
1/2 cup flour OR 1/4 cup cornstarch (I used cornstarch)
1/4 tsp salt
3 cups milk
4 eggs, separated
3 Tbsp butter
2 1/2 tsp vanilla
1 1/3 cups flaked coconut
1/2 tsp cream of tartar

1. Line a pie plate with pie crust. Trim pastry to 1/2 inch beyond edge. This is important because when it's baked, the excess will break off. Bake at 450F for 10 minutes. After crust is removed, turn heat down to 350F.

2. For filling, in saucepan combine 1 cup sugar, flour/cornstarch, and salt. Gradually stir in milk. Cook and stir until thickened and bubbly. Make sure you stir because it will burn on the bottom. Reduce heat; cook an additional 2 minutes. Remove from heat.

3. Separate egg whites and yolks. Beat yolks in a bowl. Stir in 1 cup of hot milk mixture into the yolks. This will allow the yolks to get used to the heat; otherwise, they will curdle. Pour egg mixture into milk mixture. Cook 2 minutes. Remove from heat. Stir in butter and 1 1/2 tsp vanilla. Stir in 1 cup coconut. Pour into baked pie crust.

4. For meringue, beat egg whites, 1 tsp vanilla, and cream of tartar at medium speed for 1 minute. Soft peaks should form. This means when you take the beaters out of the egg whites, peaks will form but fall back down.

5. Gradually add sugar, about 2 Tbsp at a time. Beat at high speed for 4 minutes or until stiff peaks form. When you take the beaters out, peaks will form and keep their shape.

6. Spread meringue on pie. Make sure you spread all the way to the crust and no holes are present. The meringue acts as an insulator. The filling will not cook anymore. If heat does get in, the pie may shrink. Sprinkle remaining coconut on top. Bake at 350F for 12 - 15 minutes or until meringue and coconut are golden. Cool in the refrigerator.

Source: "Better Homes and Gardens All-Time Favorite Pies," 1978 p. 32

Sunday, August 19, 2007

Finally, Homemade Fudge I Can Eat!

This is probably my fourth attempt at making homemade fudge. The first time turned out fine, but I lost the recipe. I thought, no big deal I can just google a recipe. The second time I made fudge, I didn't cook it long enough. Therefore, it never hardened properly, and you had to eat it with a spoon. The third time I made pumpkin fudge. Apparently you have to cook any fruit fudge precisely or it won't work. Once again, we ate it with a spoon. Now that I'm armed with a candy thermometer, I decided to make a batch for my mom's birthday. I couldn't get the temperature up to soft ball stage (about 235F) but it did go up to 230F. I couldn't turn the gas up any higher because the mixture bubbled over the top. After about 20 minutes, I said screw it and proceeded with the recipe. I'm thinking maybe my thermometer needs tested in boiling water to make sure it's working properly because the fudge turned out fine. This is only the third time I ever used it (damn you Wal Mart!).

Because I knew I'm not good at fudge, I did my research. I found this recipe to be very helpful in explaining the whys of fudge making. Unfortunately, I bought evaporated milk instead of sweetened condensed milk, so I continued my search. No luck in Google, so I went to Recipe Zaar. I did come across this recipe. I wasn't sure what it meant by a "hard boil" in the directions (well I know what it means, but you need to be precise for candy making). So I decided to use the ingredients from the second recipe and use the directions from the first recipe. I have never had rocky road fudge with almonds, so I used walnuts. I didn't do the washing down of the sides of the saucepan, but I think next time I will because I did get a little bit of the graininess from the sugar crystals.

It is possible to make fudge without a candy thermometer. You just have to be precise in timing. One source says to boil the mixture for four minutes, but I would do more Google research, just in case.
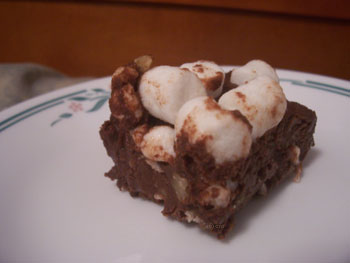

Rocky Road Fudge


1/3 cup butter, cut into chunks
1 cup evaporated milk
1 1/2 cups sugar
1/4 teaspoon salt
12 ounces semisweet chocolate, chopped
1/2 cup walnuts, toasted and chopped
1 cup mini marshmallows

1. Line a 8x8 pan with wax paper.

2. Combine butter, milk, sugar, and salt in a saucepan. Make sure the saucepan is deep enough so nothing bubbles over and a candy thermometer can be clipped on the side without the end tip touching the bottom of the pan. Stir over medium-low heat with a wooden spoon until the mixture begins to boil. As soon as the syrup starts to boil, stop stirring and clip the thermometer to the saucepan. It is important to stop stirring so the crystal structure of the sugar has dissolved. Stirring can encourage the fructose and glucose molecules to rejoin and form sucrose—crystals of table sugar (taken from Science of Candy page).

3. Let the syrup cook, undisturbed, until it reaches the soft-ball stage, about 235° F–240° F. Do not leave the kitchen in case it bubbles over! While it cooks, wash down the sides of the saucepan with a pastry brush dipped in a small amount of warm water to loosen and dissolve any sugar crystals clinging to the sides (taken from Science of Candy page).

4. Once it reaches the soft-ball stage, remove from heat. Stir in chocolate until melted. Fold in the walnuts and marshmallows. Pour into pan. At this point, you can add more marshmallows to the top if desired. Chill in the refrigerator for 2 - 4 hours. Once solid, remove the wax paper from the pan. Peel from fudge; cut into squares.

Sources: Science of Candy and Recipe Zaar

Tuesday, August 14, 2007

Mmmm Peanut Butter

Recently, Rebecca from Heaven With Strawberries baked peanut butter cookies. She was looking for a not-so-sandy cookie, so I decided to share my recipe. I haven't made these in a few years, and it's been awhile since I had peanut butter anything. Normally, you put a chocolate kiss on top, but since I was selling these at my neighborhood yard sale (not a big success since "everyone's on a diet", btw), I didn't want the chocolate to melt everywhere. The original recipe calls for 1/2 cup peanut butter. The taste isn't very strong, so next time I'm going to add 1 cup.


Peanut Butter Blossoms


1 cup peanut butter
1/3 cup shortening
1/2 cup brown sugar
1/2 cup sugar
1 egg
1 tsp vanilla
1 1/2 cups flour
1 tsp baking
36 Chocolate kisses (squares can work too, but the kisses give a better presentation)

1. Mix peanut butter, shortening, both sugars, egg, and vanilla until creamy. Stir in flour and soda. Chill dough at least 2 hours.

2. Preheat oven to 350F. Shape dough into 1 inch balls. Place onto ungreased cookie sheets. Using a fork, flatten each ball in one direction; then rotate fork and flatten in other direction. This should make a criss-cross pattern.

3. Bake for 8-10 minutes (mine took about 13 minutes). Let cool for a few minutes; then place chocolate on each cookie. Let cool completely.

Source: High school cooking class

Thursday, August 9, 2007

Beeftastic

I might not be a big fan of ground beef, but I sure do love nonground beef (What would it be called? Not just steak but also beef strips or chunks). My dad bought me (for $1.50!!!) a HUGE cookbook (772 pages not including the index) titled "The Encyclopedia of Creative Cooking." He was insisting on buying it for me because he was flipping through it and liked what he saw. I bet he loves it when I come home from school and cook. Too bad this specific cookbook is going to college with me (has every category you can imagine plus I'm probably leaving my other 87 cookbooks at home). Since I had leftover beef chunks in the freezer, I flipped through the beef section. Beef stroganoff looked easy, so that's what I made. The sauce sounded a little plain, so I researched on google. I ended up adding a can of beef broth and some flour to thicken it. I also served it on egg noodles although the recipe called for plain boiled rice. The picture isn't very good because I was eating when I realized I forgot to take a picture. Enjoy!


Beef Stroganoff


1 lb. beef tenderloin
1/2 cup chopped onion
1 cup sliced mushrooms
1 cup sour cream
10.5 can beef broth
4 Tbsp flour
Nutmeg
Vegetable oil

1. Boil pasta in water according to directions; drain when done.

2. Cut beef into thin strips. Using oil, brown in skillet until no longer pink. Remove and drain grease; wipe out the skillet.

3. Add a little more oil to skillet; fry onions and mushrooms until golden brown. Add beef.

4. Add sour cream, beef broth, flour, and nutmeg to beef mixture. Cook until liquid starts to bubble. Remove from heat; let sit for a few minutes so sauce can thicken. Serve over noodles.

Source: The Encyclopedia of Creative Cooking, 1985 p.69

Saturday, August 4, 2007

Don't Let The Name Fool You

For family vacation this year, we went to Busch Gardens in Williamsburg, VA. It's a theme park based on six countries in Europe - Ireland, England, Scotland, France, Germany, and Italy. My dad got a slice of German chocolate cake in Germany, and he commented on how there should be chocolate frosting on the sides rather than a little bit on the top. Since his birthday was August 2, I baked him a German chocolate cake with frosing on the sides.

German chocolate cake isn't a German dessert, as the name suggests. It got its name because it uses German's chocolate, and somehow when the recipe came into print, the s was dropped. Fascinating, no? This is my second attempt in my life at a layer cake. A traditional German chocolate cake is three layers; however, I went with two layers. Note - do not cut the cake recipe! I adjusted the recipe by using 2/3 of the ingredients listed. It made two very thin layers. I would just use what the recipe says and just make two thick layers. Plus the cake part wasn't tasty with my adjustments. The coconut-pecan filling is very, very rich from the canned milk, so make sure you serve the cake in tiny slices.


German Chocolate Cake


For the cake layers, I used the recipe that came with the German's chocolate box (made by Baker's Chocolate). It is replicated here. The only difference in the ingredient list is the box calls for 2 cups all-purpose flour and the site calls for cake flour. Then for the filling and frosting, I used this recipe because I had sweetened, condensed milk, not evaporated milk. The filling makes alot. The frosting I cut because I was only frosting the sides. I used half a bag of semisweet chocolate chips (I would prefer dark chocolate), 1 tablespoon corn syrup, and 4 tablespoons butter. I think the corn syrup is used to make it more spreadable, so if you don't have it, maybe you could use milk?