Showing posts with label Nuts. Show all posts

Tuesday, September 29, 2009

Tuesdays With Dorie - Chocolate-Crunched Caramel Tart


FINALLY! After waiting about 16 months, it is now my turn to host Tuesdays With Dorie. Pictures really sell me on a recipe. Although there are many great recipes without pictures, I tend to pick a recipe based on the picture. I've had my eye on Dorie's Chocolate-Crunched Caramel Tart for ages. The caramel is what really sold me. I love the combination of caramel and salted peanuts, not to mention the chocolate ganache. I used semisweet instead of bittersweet chocolate and salted peanuts.


I feel like such a bad hostess because I couldn't get a decent picture of the tart. For starters, the crust doesn't look like a tart crust. Seems like even though I used frozen butter and froze the crust before baking, the edges melt. Do I not press the crust in thick enough? Is it because I mix by hand and not with a food processor? Taste wise it's delicious.


I made this recipe twice. The first time I used my 11 inch tart pan. Mixing the peanuts into the caramel made it really hard to spread, so the caramel didn't make it to the edges. That and the tart is 2 inches bigger than what Dorie made. The peanut halves were also too big.


The second time I used baby tart pans, so I cut the recipe in half. This was my first time using the pans. The crust shrank like usual, and that really frustrates me. Shrunken crust makes it harder to remove from the pan. With the caramal layer, I decided to use baby food processor to chop the peanut halves and sprinkle on top of the caramel instead of mixing it in.

I really do love this recipe, but I still have ways to go before I can get the crust perfect. Hope all you TwDers enjoyed dessert this week.

Chocolate-Crunched Caramel Tart

Caramel
Scant 1/2 cup heavy cream
1/2 cup sugar, sifted
1 tablespoon corn syrup
2 tablespoons salted butter, cut into 4 pieces, room temperature

Ganache
8 oz bittersweet chocolate, finely chopped
1 cup + 2 tablespoons heavy cream
4 tablespoons unsalted butter, cut into 4 pieces, room temperature

3/4 cup honey-roasted peanuts, coarsely chopped
1 9-inch tart shell made with Dorie's Sweet Tart Dough (p.444), fully baked and cooled

Getting Ready: Because you have to work quickly once the sugar caramelizes, you should have all the ingredients for the caramel measured out and at hand before you start. Also have a medium heatproof bowl at hand to hold the hot caramel.

To Make the Caramel: Bring the heavy cream to a boil.

Meanwhile, put a medium skillet, preferably nonstick, over medium heat and sprinkle in about 3 tablespoons of the sugar. When it melts, stir it with a wooden spatula or fork and sprinkle over another 3 tablespoons. When that sugar is melted, add the remaining 2 tablespoons sugar - the sugar in the pan may already have started to color, and that's fine. Stir in the corn syrup and boil the syrup until it reaches a deep caramel color - it will probably begin to smoke, and that's normal.

Stand back and stir in the butter. The caramel will bubble furiously and may spatter, so make sure you're away from the action. When the butter is in, add the warm cream - the caramel will bubble furiously again. Lower the temperature just a tad and let the caramel boil for just 2 minutes (226F on candy thermometer). Pour the seething caramel into the heatproof bowl and set aside while you make the ganache.

To Make the Ganache: Put the chopped chocolate in a heatproof bowl and have a whisk or a rubber spatula at hand.

Bring the cream to a boil. Then pour half of it over the chocolate and let sit for 30 seconds. Working with the whisk/spatula, very gently stir the chocolate and cream together in small circles. Pour in the remainder of the cream and blend it into the chocolate. When the ganache is smooth and shiny, stir in the butter piece by piece. Don't stir any more than you must to blend the ingredients - the less you work it, the darker, smoother and shinier it will be.

Cover the ganache with plastic wrap, pressing it against the surface to create an airtight seal. Set aside at room temperature for the moment.

To Assemble the Tart: Stir the peanuts into the caramel. If the caramel has cooled and is too thick to spread easily, gently warm in the microwave in 3-second spurts. Spread the caramel over the bottom of the tart shell; you'll have a thin layer. Refrigerate the tart for 15 minutes to set the caramel.

Check the ganache. If it has thickened, warm it in 3-second spurts. Rap the bowl to break any surface bubbles, pour the ganache over the caramel and jiggle the pan to even it.

Refrigerate for 30 minutes - no longer - then keep it at room temperature until serving time.

Baking: From My Home To Yours pages 355-357

Sunday, September 13, 2009

Rocky Road Brownies

Here's a tip I learned over the years. Just because your cookbook says holiday cookies doesn't mean you can only make them for the holidays. In fact, nothing about the recipes makes them holiday only (except maybe pumpkin for fall cookies and the way cut-out cookies are decorated). Take these rocky road brownies for example. The book is called Grandma's Christmas Cookies, but give me one good reason why these should be made only for Christmas. In fact, I bet if I didn't tell you the title of the book, you never would have known. Personally, holiday cookbooks were invented so if I were making a cookie tray, having company, or invited to a cookie exchange (someone please invite me!), I don't have to look very far for an "elegant" recipe. By elegant I mean more than your traditional chocolate chip cookie.


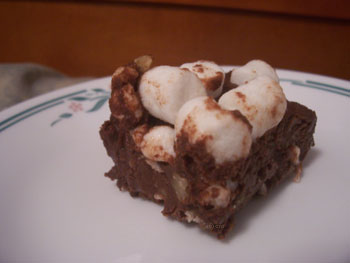
Fact - I hate, hate, HATE the lighting in my kitchen. Another fact - I love marshmallows, which is why I picked these brownies. That and the picture in my book looked amazing. Plus I had peanuts leftover. The topping looked amazing, and I tried to capture that in a photo, but it was hard because the brownies are very gooey. It is best to eat these cold because of the topping, but they can also be eaten at room temperature (provided that it's not a hot summer's day).

Rocky Road Brownies


1/2 cup butter or margarine
2 squares (1 oz each) unsweetened chocolate
3/4 cup sugar
1/2 cup flour
2 eggs
1 tsp vanilla
1/4 cup salted peanuts, chopped

Topping
2 Tbsp butter or margarine
1 1/2 oz cream cheese
1/2 square (1/2 oz) unsweetened chocolate
2 Tbsp milk
1 1/4 + 2 Tbsp powdered sugar
1/2 tsp vanilla
1 cup mini marshmallows
1/2 cup salted peanuts

1. Preheat oven to 350F. Line 8x8 pan with greased foil.

2. In a saucepan, melt butter and chocolate, stirring constantly. Add sugar, flour, eggs, and vanilla; mix well. Stir in peanuts. Spread into baking pan. Bake 20-25 minutes or until brownie starts to pull away from sides of pan. Cool completely

3. Topping: In another saucepan, combine butter, cream cheese, chocolate, and milk. Heat until melted, stirring constantly. Remove from heat. Add sugar and vanilla. Beat with mixer until smooth. Stir in marshmallows and peanuts. Immediately spread over cooled brownies. Cool completely before cutting. Store in refrigerator.

Source: Grandma's Christmas Cookies 1997 p.62

Friday, April 3, 2009

How (Not) To Zest A Lime

Whenever I was in San Salvador a few weeks ago, I bought a postcard with a Bahamian rum cake recipe. I don't like drinking rum but I needed to buy an even number for the price. Whenever I was waiting at the airport in Nassau, I had samples of rum cake. The original version was alright; I could definitely taste the rum, but I did like it. Then I tried the key lime version. It was amazing! The rum was an undertone flavor because the lime really took over. This made me a little more excited to try my rum cake recipe.


Back in August, I bought a bottle of Puerto Rico golden rum for a Tuesdays With Dorie challenge. It sat in my room for about six months, so I gave it to my best friend. She ended up never drinking it, so we decided to use that rum. The recipe actually calls for dark rum, and after doing some research, dark rum really does matter in the flavor, but I went with the golden rum anyway.

I stopped at the store to buy a lime, and while I was driving to my friend's house, I thought, I hope she has a grater. Yea, she should. Most kitchens have one. Yea, MOST kitchens. Not all. We dug through her cabinets but no grater. Now how do I zest my lime? Her boyfriend suggested a fork. Didn't work, so I went for the vegetable peeler. Ahem.


Ok so we have big chunks of lime. Now what? Let's use the food processor! Oh wait, it won't turn on. How about the blender?


The motor is running, but the blades aren't turning!


Fine, we'll just use a knife (her pretty nails, not mine)


FAIL!

We really shouldn't be baking together. We can't zest a lime, assemble a cake, read directions, or bake giant snickerdoodles. Better yet, I blame her kitchen. It always goes wrong in her kitchen haha

As for the recipe, it was written for a regular-sized bundt pan. I bought two baby ones at Wal Mart, so I somehow scaled it down (successfully too!). There was way too much lime in ours, but that's because it was chunky and I forgot to scale down the lime when I scaled down the recipe. Whoops. Next time, I want to buy a small bottle of dark rum and see if there is a difference. I may throw in coconut at some point.

I will write both recipes in case you can't read the postcard above. We didn't make the glaze because the cakes were fine without it.

Bahama Rum Cake


Regular Bundt Cake:
1/2 cup chopped walnuts/pecans
1 cup butter
1 cup sugar
4 eggs
Zest and juice from one lime
1 1/2 cups flour
1 tsp baking powder
1/2 cup milk
1/2 cup dark rum
1 tsp vanilla
1/2 cup raisins
--
1/4 cup butter
1/4 cup water
3/4 cup sugar
1/2 cup dark rum
1/2 tsp vanilla

Mini Bundt Cakes:
2 Tbsp chopped walnuts/pecans
1/4 cup butter
1/4 cup sugar
1 egg
Zest and juice of 1/4 lime
1/3 cup flour
1/4 tsp baking powder
2 Tbsp milk
2 Tbsp dark rum
1/4 tsp vanilla
2 Tbsp raisins
--
1 Tbsp butter
1 Tbsp water
2 Tbsp sugar
2 Tbsp dark rum
1/8 tsp vanilla

1. Cake: Preheat oven to 325F. Grease bundt pan(s). Line the base with nuts.

2. Cream butter and sugar together. Beat in eggs and add lime. Mix in flour, baking powder, and milk. Add rum, vanilla, and raisins. Pour mixture into pan(s) and bake 1 hour for large cake and 20-30 minutes for mini cakes. Cake(s) are done with a toothpick comes out clean. Let cool for 10 minutes then remove from pan(s).

3. Glaze: Melt butter in saucepan. Add water and sugar. Boil and stir 4-5 minutes. Remove from heat; add rum and vanilla. Pierce cake and brush glaze over top and sides. Repeat. Steep cake in pan.

Makes: 1 large cake or 2 mini cakes

Source: San Salvador postcard

Tuesday, March 31, 2009

Tuesdays With Dorie - Coconut Butter Thins


This week's pick was Coconut Butter Thins. Dorie calls them thins because these cookies spreeaaaddddd! I was disappointed after removing them from the oven because when they went in, they were plump little rectangles.

I modified the recipe a bit with ingredients on hand. I had a lemon to use, so instead of lime zest went the lemon. I think I put too much in because the lemon is very strong. Whoops. I also used walnuts instead of macadamia nuts because they were $4 a bag at Wal Mart. I would definitely make these again because I love how shortbread-based cookies melt in your mouth. Maybe I will make it with the specified ingredients haha


Thanks Jayne of The Barefoot Kitchen Witch for picking these delightful tropic treats! You can find the recipe on page 145 of Baking: From My Home to Yours or on Jayne's blog.

Saturday, November 29, 2008

Tuesdays Thanksgiving With Dorie


This week's recipe was perfect for Thanksgiving. If you can't decide between pumpkin or pecan pie, this pie allows you to have both. I've had my fair share of pumpkin pie, but I don't think I can recall ever having pecan pie. With this recipe, I think I expected more of a sugary topping. Although the pie was good, I didn't think it was THAT great.

Mine fell apart when cutting it, but it was fine after being refrigerated. It might have been the crust. My dad decided to buy premade pie crusts, so I used one of those.

Thanksgiving Twofer Pie


Thanks to Vibi of La Casserole Carree for choosing this pie so close to Thanksgiving. You can find the recipe here.

Tuesday, October 14, 2008

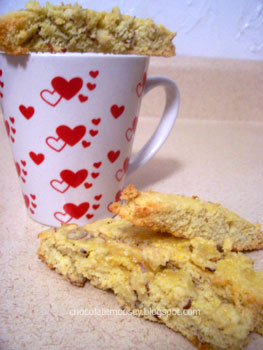
Tuesdays With Dorie - Lenox Biscotti


This week's recipe is Dorie's Lenox Biscotti. I have never made biscotti before, even though I am mainly Italian (gasp!). This recipe differs from other biscotti recipes because it calls for cornmeal. Whenever I went to the apple festival two weekends ago, I got really excited when I saw freshly-made cornmeal and flour for $1 each bag. I bought cornmeal and whole wheat flour, which is weird because I'm not a fan of wheat bread. They also had bran and flax seed, but I had no idea what I would do with them. I'm such a dork because only I would get excited over fresh flour. The farm has been doing this every year for how many years now, and this time I actually noticed. Probably because I haven't been observant of ingredients before.

A tip I never knew. You want to freeze flour to kill off any bugs. Also, flour tends to go rancid quickly, so freezing slows that process down by a few months. You could use the refrigerator too. Most families don't freeze flour because they go through all-purpose flour rather quickly. Just make sure you use air-tight bags or containers to keep moisture out.

Anyway, back to the biscotti. Dorie says to make the logs 12 x 1.5 inches, which make seem really skinny, but trust me. I didn't understand the dimensions either until after they were done baking because they spread ridiculously. Then she said to stand them up like a marching band after cutting for the second baking. Several TwDers were confused, and some of theirs wouldn't even stand up. Mine stood up just fine. If you are confused, Dorie means to stand them up so the cut sides are exposed. Mine came out fine, softer than the average biscotti, which my dad loved. He hates the really crunchy kind, but biscotti stands for twice baked and is meant to dip in a hot beverage. Some TwDers were saying they had to bake theirs longer, so maybe that's why mine came out soft. Some of them did fall apart but for the most part they held together. Try to bake only one tray at a time because I baked two trays, and the bottom tray cookies got burnt while the top tray was fine.

I made the lemon almond version. Since I only had one lemon and Dorie calls for two, the lemon taste was more of a backdrop while the almond, particularly the almond extract, was in your face. I highly recommend using two lemons.

I can now scratch this off of my challenge list.

Lenox Biscotti


Thanks Gretchen from Canela & Comino for picking this week's recipe! You can find the recipe on page 141-143 in Baking: From My Home To Yours or on Gretchen's blog.

Tuesday, October 7, 2008

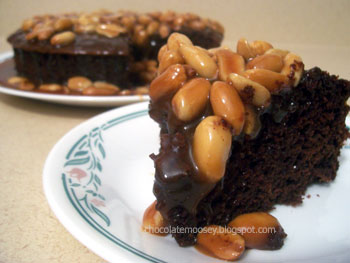
Tuesdays With Dorie - Caramel Peanut Topped Brownie Cake


I was really excited when this week's recipe was Caramel Peanut Topped Brownie Cake because that was one of the recipes where the picture was making me drool. Unfortunately, I wasn't too crazy about it while eating. My family liked it, so I think it was my tastebuds rather than the actual baking.

EDIT - Ok I just ate a slice from the fridge. A lot better than my first tasting. Plus I think it's the cake part I didn't like, not the topping. I'm eating the topping alone and yummy! Maybe it's the chocolate I used. I did use cheap chocolate because I can't afford better haha

A few words of caution. One, this cake rises like no other, so be careful if you are making smaller portions like cupcakes. I used a 9-inch round cake pan, and it was as full as you can get. Two, making caramel sauce is dangerous and tricky. I burnt my finger about a year ago, and the mark was there for about a month. The temperature of the syrup is hotter than boiling water, and it sticks to your finger, so that few seconds from contact to wiping it off really makes it hurt worse than boiling water. Also, caramel sauce burns fast if you aren't watchful. Dorie suggests 5-10 minutes. A lot of TwDers, including myself, found it to be 15 minutes. You want the color to be a few shades lighter than a deep amber when you turn the heat down because it continues cooking and will go from deep amber to burnt in about 30 seconds. Trust me. I had to make the sauce twice because it burnt the first time. And burnt caramel smells.

This past weekend plus yesterday and today is my school's fall break. I've been baking almost non-stop plus I went to an apple festival Saturday afternoon. This cake is one of the many items I baked and also gave away to my best friend's grandparents (since I don't have grandparents of my own).

Caramel Topped Peanut Brownie Cake


Thanks Tammy from Wee Treats by Tammy for choosing this week's recipe! You can find it on pages 264-265 of Baking: From My Home To Yours or visit Tammy's blog.

Friday, September 5, 2008

Leftover Egg Whites No More!

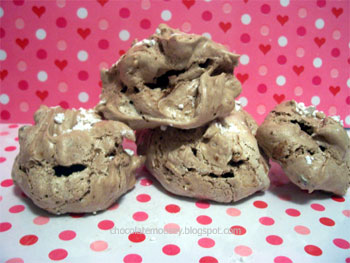
Don't you hate it when a recipe calls for egg yolks and you have no clue what to do with the egg whites? I remember my friend saying a long time ago she made meringues and I should really give them a try. I knew what meringues were and that they involved egg whites, but I actually never had a meringue. I have made Dorie Greenspan's recipe twice this past summer - once following her recipe using almonds and again substituting walnuts and adding coconut. I prefer the almonds, but really it's up to preference.

If you are like my family and I and never had meringues, be prepared. The texture is weird, so I didn't like the way it felt on my teeth. But somewhere after the first few cookies, I changed my mind and now I crave them.

Cocoa Almond Meringues


These cookies were baked back in June. As much as I've been posting, I can't seem to catch up on my recipes haha You can find the recipe on page 155 of Dorie Greespan's book Baking: From My Home To Yours.

Thursday, February 14, 2008

When Mother Nature Gives You Snow, Bake Bread

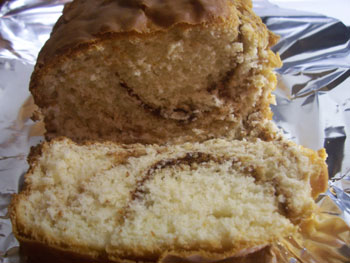
All this cold weather makes me crave warm, comforting foods. Lately I've been craving a quick bread of some sort. I didn't have enough bananas, so banana bread was out. I really didn't want applesauce bread nor did I want to shred carrots for carrot bread. I was looking through Quick Bread Winners from Betty Crocker that Anj had given me when I found Glazed Cinnamon Breakfast Loaf. I didn't want any glaze, but the loaf alone sounded good. Plus it uses basic ingredients. Well, almost basic. It calls for buttermilk baking mix (aka Bisquick), but you can make your own. I honestly think you don't need the extra sugar and calories from the glaze, but I'll attach the recipe for those who have a really sweet tooth. It calls for raisins, but feel free to use nuts. I was going to use walnuts, but I forgot.


Cinnamon Breakfast Loaf


3 cups buttermilk baking mix
1/2 cup sugar
1/3 cup flour
1 egg
1 cup milk
1/4 cup brown sugar
1 1/2 tsp cinnamon
1/2 cup raisins or nuts

Glaze (optional)
3/4 cup powdered sugar
1 Tbsp butter
3/4 tsp vanilla
2-3 tsp hot water

1. Heat oven to 350F. Grease a 9x5x3 loaf pan.

2. Beat baking mix, sugar, flour, egg, and milk on low speed of mixer 30 seconds. Beat on medium speed for 3 minutes. Stir in raisins/nuts. In a separate bowl, mix brown sugar and cinnamon. Pour 1/3 of the batter (2/3 cup) into pan. Sprinkle layer with 3 Tbsp cinnamon mixture. Repeat 2 more times.

3. Bake for 55-60 minutes or until a toothpick comes out clean when inserted in the center. Cool 10 minutes before removing from pan. Cool completely before drizzling with glaze.

4. Glaze: Beat sugar, butter, vanilla, and water until smooth consistency. Drizzle on bread when cool.

Source: Quick Bread Winners from Betty Crocker, 1985 p.61

Friday, November 30, 2007

Bake-Off Challenge With Megan

Whenever I sent Megan an extra copy of Pillsbury's 15th National Bake-Off Cookbook, we agreed to pick a recipe and bake it. Some can call it our own mini bake-off. Megan sent me a list of several recipes she picked, and I picked which one we would do first. I chose a recipe called Apple Harvest Squares, which was entered by Rex Pippin of Alabama.

I decided to bake these while I was home for Thanksgiving break. The base is very similar to a pie crust. Normally you would use a pastry cutter. I remember reading in Dorie Greenspan's book Baking: From My Home To Yours, you can also use your hands to cut butter, so I did. The result was fine, although I would suggest pressing it into the pan with the bottom of a glass. The topping didn't make enough to cover the entire base, so next time I would increase it just a smudge. I put the adjustments into the recipe below. These taste best when served warm.

Megan, we need to do this again :)

EDIT - Oops, there has been a misunderstanding!! Megan ended up doing Sweet Applets instead. Oh well, at least they both have apple. Now we can switch recipes and see if we get the same results. Hopefully so, because her applets look good!


Apple Harvest Squares


Base
1 1/2 cups flour
1/3 cup sugar
3/4 tsp salt
1/2 cup butter
2 cups chopped apples (I used Granny Smith)
1/8 cup sugar
1/2 tsp cinnamon

Topping
1/2 cup sugar
1/2 cup evaporated milk
1 tsp vanilla
1 cup chopped walnuts
2 cups flaked coconut

1. Preheat oven to 375F. Grease the bottom of a 13x9 pan.

2. Sift together flour, 1/3 cup sugar, and salt. Cut in butter until particles are fine. Press into bottom of pan. Arrange apples on top. Combine 1/8 cup sugar and cinnamon; sprinkle on top. Bake for 20 minutes.

3. Meanwhile, combine 1/2 cup sugar, milk, vanilla, walnuts, and coconut. Spoon over baked base. Bake for another 25-30 minutes or until golden brown.

Source: Pillsbury's 15th Grand National 100 New Bake-Off Recipes, 1964 p.43


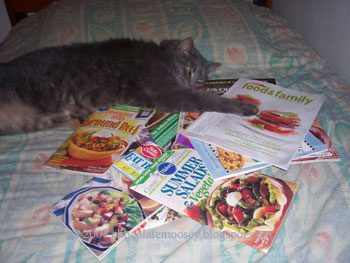
Murray getting ready for the holidays


Monday, October 15, 2007

Sugar High Friday - My First Time

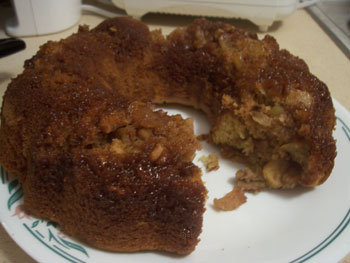
Challenges are awesome to enter because they give you another excuse to bake (or cook). For this month's Sugar High Friday, I had to bend the rules a tiny bit. You see, the theme is drunken apples. Given that I'm only 20, I can't go out and buy any alcohol. My parents don't keep any alcohol in the house, and they weren't going to buy me a bottle just for this challenge (damn it). I decided to use the next best thing - rum extract. I ended up baking this cake at home during my fall break two weekends ago after I went to a local apple festival. I was going to sub the vanilla extract for rum extract, but my mom is very picky and isn't crazy about rum. No worries; I used it in the glaze. Since my mom didn't want the rum extract, I made a little bit of glaze for about two pieces of cake. Let's just say the extract is really strong for such a little bit of glaze. I think if you made an actual bowl of glaze, the milk and sugar would balance out the strongness of the rum. I suggest only adding 1/8 tsp and then add more for taste.

Also, I learned an interesting fact while baking this. I thought the title was Apple Streudel Cake, not Apple Streusel Cake. The streusel is the crumb topping usually baked on top of baked goods. In this case, it's in the middle. A streudel (or strudel) similar to a pocket pastry.


Apple Streusel Cake


Streusel
1 cup brown sugar
1 cup chopped apples (I used Golden Delicious)
1 cup nuts
1/4 cup flour
1 tsp cinnamon
3 tbsp butter, melted

Cake
2 cups flour
1 tsp baking powder
1 tsp baking soda
1/2 cup butter, softened
3 eggs
1/2 tsp vanilla extract
1/3 cup milk

Glaze
1/4 cup butter, melted
2 cups powdered sugar
2 Tbsp. milk
1/8 tsp. rum extract (add more if needed)

1. Preheat oven to 350F. Grease bundt pan. In a bowl, combine brown sugar, apples, nuts, 1/4 cup flour, and cinnamon. Stir in melted butter.

2. In another bowl, combine 2 cups flour, baking powder and baking soda. In a third bowl, beat butter and sugar until fluffy. Add eggs, one at a time. Add vanilla. Alternately beat in flour mixture and milk.

3. Spoon half of the batter mixture into pan. Spread all of streusel on top. Top with remaining batter. Bake 45-50 minutes or until a toothpick inserted comes out clean. Let cool for a few minutes; remove from pan. Serve warm.

4. For the glaze, stir all ingredients together. Add more sugar if it's too runny; add more milk if it's too thick.


Source: Creative Cook's Kitchen handout, Cakes and Pies group 1 card 3


When I'm home from school, I have a little sous chef. Unfortunately, he was a little occupied when I was baking.

Sunday, August 19, 2007

Finally, Homemade Fudge I Can Eat!

This is probably my fourth attempt at making homemade fudge. The first time turned out fine, but I lost the recipe. I thought, no big deal I can just google a recipe. The second time I made fudge, I didn't cook it long enough. Therefore, it never hardened properly, and you had to eat it with a spoon. The third time I made pumpkin fudge. Apparently you have to cook any fruit fudge precisely or it won't work. Once again, we ate it with a spoon. Now that I'm armed with a candy thermometer, I decided to make a batch for my mom's birthday. I couldn't get the temperature up to soft ball stage (about 235F) but it did go up to 230F. I couldn't turn the gas up any higher because the mixture bubbled over the top. After about 20 minutes, I said screw it and proceeded with the recipe. I'm thinking maybe my thermometer needs tested in boiling water to make sure it's working properly because the fudge turned out fine. This is only the third time I ever used it (damn you Wal Mart!).

Because I knew I'm not good at fudge, I did my research. I found this recipe to be very helpful in explaining the whys of fudge making. Unfortunately, I bought evaporated milk instead of sweetened condensed milk, so I continued my search. No luck in Google, so I went to Recipe Zaar. I did come across this recipe. I wasn't sure what it meant by a "hard boil" in the directions (well I know what it means, but you need to be precise for candy making). So I decided to use the ingredients from the second recipe and use the directions from the first recipe. I have never had rocky road fudge with almonds, so I used walnuts. I didn't do the washing down of the sides of the saucepan, but I think next time I will because I did get a little bit of the graininess from the sugar crystals.

It is possible to make fudge without a candy thermometer. You just have to be precise in timing. One source says to boil the mixture for four minutes, but I would do more Google research, just in case.


Rocky Road Fudge


1/3 cup butter, cut into chunks
1 cup evaporated milk
1 1/2 cups sugar
1/4 teaspoon salt
12 ounces semisweet chocolate, chopped
1/2 cup walnuts, toasted and chopped
1 cup mini marshmallows

1. Line a 8x8 pan with wax paper.

2. Combine butter, milk, sugar, and salt in a saucepan. Make sure the saucepan is deep enough so nothing bubbles over and a candy thermometer can be clipped on the side without the end tip touching the bottom of the pan. Stir over medium-low heat with a wooden spoon until the mixture begins to boil. As soon as the syrup starts to boil, stop stirring and clip the thermometer to the saucepan. It is important to stop stirring so the crystal structure of the sugar has dissolved. Stirring can encourage the fructose and glucose molecules to rejoin and form sucrose—crystals of table sugar (taken from Science of Candy page).

3. Let the syrup cook, undisturbed, until it reaches the soft-ball stage, about 235° F–240° F. Do not leave the kitchen in case it bubbles over! While it cooks, wash down the sides of the saucepan with a pastry brush dipped in a small amount of warm water to loosen and dissolve any sugar crystals clinging to the sides (taken from Science of Candy page).

4. Once it reaches the soft-ball stage, remove from heat. Stir in chocolate until melted. Fold in the walnuts and marshmallows. Pour into pan. At this point, you can add more marshmallows to the top if desired. Chill in the refrigerator for 2 - 4 hours. Once solid, remove the wax paper from the pan. Peel from fudge; cut into squares.

Sources: Science of Candy and Recipe Zaar

Saturday, August 4, 2007

Don't Let The Name Fool You

For family vacation this year, we went to Busch Gardens in Williamsburg, VA. It's a theme park based on six countries in Europe - Ireland, England, Scotland, France, Germany, and Italy. My dad got a slice of German chocolate cake in Germany, and he commented on how there should be chocolate frosting on the sides rather than a little bit on the top. Since his birthday was August 2, I baked him a German chocolate cake with frosing on the sides.

German chocolate cake isn't a German dessert, as the name suggests. It got its name because it uses German's chocolate, and somehow when the recipe came into print, the s was dropped. Fascinating, no? This is my second attempt in my life at a layer cake. A traditional German chocolate cake is three layers; however, I went with two layers. Note - do not cut the cake recipe! I adjusted the recipe by using 2/3 of the ingredients listed. It made two very thin layers. I would just use what the recipe says and just make two thick layers. Plus the cake part wasn't tasty with my adjustments. The coconut-pecan filling is very, very rich from the canned milk, so make sure you serve the cake in tiny slices.


German Chocolate Cake


For the cake layers, I used the recipe that came with the German's chocolate box (made by Baker's Chocolate). It is replicated here. The only difference in the ingredient list is the box calls for 2 cups all-purpose flour and the site calls for cake flour. Then for the filling and frosting, I used this recipe because I had sweetened, condensed milk, not evaporated milk. The filling makes alot. The frosting I cut because I was only frosting the sides. I used half a bag of semisweet chocolate chips (I would prefer dark chocolate), 1 tablespoon corn syrup, and 4 tablespoons butter. I think the corn syrup is used to make it more spreadable, so if you don't have it, maybe you could use milk?

Sunday, July 8, 2007

Weekend Cookbook Challenge 18

What do you do when you can't find the recipe you're looking for? Make it up. That's right. I made my own recipe!! I had 1 lemon that I needed to use up. When my dad was going through the cupboard above the stove, he pointed out that I had jumbo shells I needed to use (they were up there probably at least a year). What does lemon juice + shells equal? Greek stuffed shells, of course. I googled for recipes, but I got nothing. So I took the typical Greek ingredients and replaced the Italian ingredients with these. I also decided to enter this into the Weekend Cookbook Challenge 18 - Red and White due to the tomatoes and cucumber sauce.

EDIT - Round up is now posted.


Greek Stuffed Shells


12 jumbo shells
1 cup plain yogurt
1 cup cucumber, peeled and diced
1/4 tsp garlic powder
1 tsp dillweed
3 Tbsp lemon juice
1 cup feta cheese, crumbled
1/2 cup tomatoes, chopped
1 egg, beaten
5 black olives, chopped

1. Boil water. Cook shells for 10 minutes. Drain; run under cold water to stop any further cooking.

2. For the sauce, combine yogurt, cucumbers, garlic powder, 1/2 tsp dillweed, and 1 Tbsp lemon juice. Cover and let chill in the refrigerator.

3. Combine cheese, 1/2 tsp dill, 2 Tbsp lemon juice, tomatoes, egg, and olives.

4. Preheat oven to 350F. Spread the bottom of 13x9 pan with some of the sauce. Place shells on top. Stuff with the cheese mixture. Pour remaining sauce on top. Cover with foil. Bake for 35 minutes.

Source: Sauce from Recipe Zaar, Shell recipe by me


Nectarine Crisp


I also made dessert. This has nothing to do with Greek cuisine but still delicious nonetheless. I used this recipe from Recipe Zaar. I left out the blueberries and wheat germ. Next time, I will try it with raspberries.

Saturday, June 30, 2007

The Portable Breakfast Snack

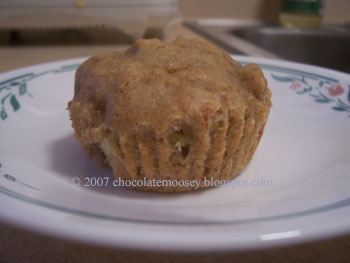
Since I want to eat healthier for breakfast, I decided I should start baking muffins. The only problem is that they don't last more than a day LOL Once I start finding recipes I like, I'll start doubling and reserving muffins for my breakfast. This one is a keeper.


Banana Nut Muffins


2 extra ripe bananas
2 eggs
1 cup packed brown sugar
1/2 cup melted butter
1 tsp. vanilla
2 1/4 cups flour
2 tsp. baking powder
1/2 tsp. cinnamon
1/2 tsp. salt
1/2 cup chopped walnuts

Beat bananas, eggs, sugar, butter and vanilla. In a separate bowl, combine flour, baking powder, cinnamon and salt. Stir nuts into dry ingredients. Add banana mixture to flour mixture. Mix just until well blended. Spoon into well-greased muffin tins. Bake at 350F for 25-30 minutes.

Source: Bake Bake Bake LJ

I'm also watching a show on Food Network where 5 finalists are competing to make the next Hagan Daas ice cream flavor. That would be so much fun!! I don't know if any company has made this, but I would go for a banana foster flavor. I really need to buy an ice cream maker lol


Le Chef Murray