Saturday, August 30, 2008

Wonton Soup

My mom is very hard to please when it comes to dinner, so I know this soup is a winner when she keeps asking for it. I remember the first time I planned on making it, I could not find wonton wrappers. First, I checked the Asian food aisle. After running around the store, I asked the front desk. Turns out they are in the produce section by the tofu since the wrappers are made of soy. Wonton wrappers are very versatile because you can fill them with anything, whether it's an appetizer, dinner, or dessert. We serve this soup along with eggrolls.

Wonton Soup


6 oz pork, chopped into tiny pieces
1 tsp brown sugar
1 Tbsp orange juice
2 Tbsp soy sauce
1 tsp scallions, chopped
1/4 tsp ground ginger
24 wonton wrappers
4 cups chicken broth
Extra scallions for garnish

1. Mix together pork, brown sugar, orange juice, 1 Tbsp soy sauce, and 1 tsp scallions in a small bowl. Let sit for at least 30 minutes.

2. After 30 minutes, place 1 tsp filling in center of each wrapper. Wet edges with a little water and press two opposite corners together to seal. Fold another two opposite corners together.

3. Bring stock to a rolling boil in a wok. Add wontons and cook 5 minutes. Add remaining 1 Tbsp soy sauce and scallions. Serve in soup bowls.

Source: Book from the library (forgot to write the title down)

Friday, August 29, 2008

I Need To Expand My Foodie Horizons...

What's your Omnivore 100 score?

I was visiting Arlene of The Food of Love when I came across her Omnivore 100 list. She found the idea on another blog and decided to give it a go. So will I. Copy and paste the list onto your blog, go through the list and bold all the items you've eaten. Use red to denote the items you would never consider eating. Use blue to denote the items you would like to try. Italicize those items that you don't recognize (I did cheat and googled the ones I don't know because sometimes I know them by dish but not by name). After you are finished, count how many are bold. That is your omnivore score.

1. Venison
2. Nettle tea
3. Huevos rancheros
4. Steak tartare
5. Crocodile
6. Black pudding
7. Cheese fondue
8. Carp
9. Borscht
10. Baba ghanoush
11. Calamari
12. Pho
13. PB&J sandwich
14. Aloo gobi
15. Hot dog from a street cart
16. Epoisses
17. Black truffle
18. Fruit wine made from something other than grapes
19. Steamed pork buns (??? what do they mean by buns?)
20. Pistachio ice cream
21. Heirloom tomatoes
22. Fresh wild berries
23. Foie gras
24. Rice and beans
25. Brawn or head cheese (although I have eaten haggis which probably isn't any better haha)
26. Raw Scotch Bonnet pepper
27. Dulce de leche
28. Oysters
29. Baklava
30. Bagna caud
31. Wasabi peas
32. Clam chowder in a sourdough bowl
33. Salted lassi
34. Sauerkraut
35. Root beer float
36. Cognac with a fat cigar
37. Clotted cream tea
38. Vodka Jelly/Jell-O
39. Gumbo
40. Oxtail
41. Curried goat
42. Whole insects
43. Phaal (maybe at an Indian buffet?)
44. Goat’s milk (I heart goat cheese!)
45. Malt whisky from a bottle worth £60/$120 or more
46. Fugu (although I've heard if not prepared correctly, it can be deadly)
47. Chicken tikka masala
48. Eel
49. Krispy Kreme original glazed doughnut
50. Sea urchin
51. Prickly pear
52. Umeboshi
53. Abalone
54. Paneer
55. McDonald’s Big Mac Meal (not sure if I actually had the meal though)
56. Spaetzle
57. Dirty gin martini
58. Beer above 8% ABV (alcohol by volume) (I've had beer before. Not sure of ABV)
59. Poutine
60. Carob chips
61. S’mores
62. Sweetbreads
63. Kaolin
64. Currywurst
65. Durian
66. Frogs’ legs
67. Beignets, churros, elephant ears or funnel cake
68. Haggis
69. Fried plantain
70. Chitterlings, or andouillette
71. Gazpacho
72. Caviar and blini
73. Louche absinthe (almost in London, but it smelled like anise and I gagged)
74. Gjetost, or brunost
75. Roadkill
76. Baijiu
77. Hostess Fruit Pie
78. Snail
79. Lapsang souchong
80. Bellini
81. Tom yum
82. Eggs Benedict
83. Pocky
84. Tasting menu at a three-Michelin-star restaurant
85. Kobe beef
86. Hare/rabbit
87. Goulash
88. Flowers
89. Horse
90. Criollo chocolate
91. Spam
92. Soft shell crab
93. Rose harissa
94. Catfish
95. Mole poblano
96. Bagel and lox
97. Lobster Thermidor
98. Polenta
99. Jamaican Blue Mountain coffee
100. Snake

My score is 32. I better expand my foodie horizons some more!

Thursday, August 28, 2008

Fish Ideas!

I don't feel like posting a recipe today, but I do need some help. Now that I'm back at school and cooking for myself, I want to try new things. I always cook with chicken or beef, so I want to add more fish to my diet. I need fast and budget-friendly recipes. You can either email me recipes at mooseymoosecc[at]hotmail.com or just leave a comment. Thanks! I love all of my visitors <3

Tuesday, August 26, 2008

That Back-To-School Boost - Part 2

Yesterday, I talked about why it is important to buy freshly roasted and whole coffee beans. Today, I'm going to talk about the different drinks and two syrups you can make at home.

When you order a drink at a coffee shop, whether it's a chain like Starbucks or just a local cafe, there are many choices. An espresso is coffee produced with a pump or lever machine. If you order just an espresso, you'll get roughly 2 oz. of coffee. It is the base of almost all the coffee drinks at coffee shops. A cappuccino is 1/3 espresso, 1/3 steamed milk, and 1/3 frothed milk. A caffe latte (or just simply latte) is espresso and steamed milk. Sometimes it is topped with a thin layer of frothed milk. There is one important detail many people overlook - ordering a cappuccino or caffe latte does not mean flavoring! If you want a caramal latte, you have to say caramal latte so the barista will add the syrup. If you simply order a latte, you will get coffee and milk. No caramel, no mocha, nothing. I don't even think they put sugar in it. Same goes when ordering a cappuccino.

If you find yourself constantly buying drinks at coffee shops, you may want to invest in an espresso maker and grinder. Mine went for $30 at Wal Mart, but it's a steam machine and not a pump machine. Pump machines make the best quality espresso (hence why they are expensive). Steam machines produce espresso, but it's on the low quality end because it may "burn" the coffee grinds when the hot water passes through. If you are the type that adds sugar and syrups to your drinks, then you'll be fine. I'm content with my machine (at least until I somehow find the money for a pump machine). However, if you are the type that drinks coffee black, then you may notice a taste difference.

As for the coffee syrups, they can be pretty expensive if buying from the store. Being the foodie that I am, I learned to make homemade syrups for more than half the cost. You can pretty much do any flavor if you have the correct extract, but my two favorites are caramel and mocha. One thing I noticed when making the caramel syrup is when it cools to room temperature, a thin solid layer forms at the top. After a bit of poking, I'm thinking it's the margarine. I have no clue on how to prevent this, so I let mine sit in the pan until the layer forms. Then I use a baby strainer and scoop it out. I've had no problems with the mocha syrup. I use plasic squeeze bottles for easy storage and pouring.

It's hard to see the caramel syrup in my picture, but it's there.

Caramel and Mocha Coffee Syrups


Mocha Syrup
3/4 cup water
1/2 cup sugar
1/4 cup Dutch-processed cocoa powder
1/4 cup regular cocoa
2 Tbsp vanilla extract

Boil water in a small saucepan. Once boiling, add sugar and cocoas. Beat with a whisk or fork until dissolved. Add vanilla and stir. Remove from the heat and let it cool before transfering to a container. Makes 8 ounces.

Source: Recipe Zaar

Caramel Syrup
4 Tbsp butter or margarine
1 cup brown sugar
1/2 cup water

Melt butter in a saucepan. Add sugar and mix together until it becomes moist and sticky. Add water and stir until sugar is dissolved. Boil mixture for a few minutes before removing from the heat. Let it cool to room temperature. If a solid layer forms, scoop out and throw away. Transfer to a container. Makes 8 ounces.

Source: Recipe Zaar

Monday, August 25, 2008

That Back-To-School Boost - Part 1

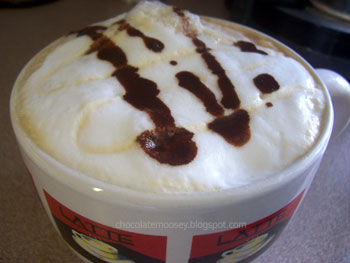
A brand new semester started today for most college students. I technically don't start until tomorrow because I only have Tuesday/Thursday classes (11:00 - 6:15 with a break 12:30 - 2). What a better way to start your day than with a nice cup of coffee?

Ever since I received my espresso maker for Christmas (steam operated, not pump so I make low-quality drinks compared to coffee houses), I've been doing research and becoming more knowledgable. For starters, you never want to buy ground coffee. As soon as the beans are grinded, they instantly start losing their freshness. Trust me, once you've been exposed to fresh coffee, you'll think Folgers and Maxwell House taste like crap. I've learn when a place offers free coffee (like a brunch line or hotel complimentary breakfast) not to take any because they use stale coffee (mainly without knowing and it's cheaper).

Even buying the whole beans in a grocery store isn't a better option. Sure, it's "fresher" than the packaged ground coffee, but who knows how long those beans have been sitting in the store. I haven't tried the brand-name packaged whole beans (like Seattle's Best or Folger's), but I bet they have been sitting the bags for a few weeks at least.

For the best quality, you don't want to grind the beans until right before you make the coffee. When I was grinder shopping, I had so much trouble finding a grinder that produced a fine enough grind for my espresso maker. When someone makes espresso, it isn't referring to a type of bean. Espresso refers to the grind of the bean. It is a very fine grind compared to drip coffee. Drip coffee is what most Americans make at home - place coffee grinds in a paper filter, insert it into the machine, add water, and let the water drip through the filter and into your pot (hence, drip coffee). The coffee grounds for drip coffee is a little more "chunkier" while espresso grind is similar to a powder. After trying several grinders, I finally settled on the Capresso Infinity Burr Grinder. Expensive, yes but it gets the job done. I've spent two whole weeks researching and checking customer reviews of grinders out there. This is the best one you are going to get for espresso makers.

You also want to buy whole beans as close to the roasting date as possible. Now, unless you have a local coffee shop, you probably won't be able to find out the roasting date on most beans. That is why I resorted to buying mine online. I've only bought mine from Boca Java, and when you receive your bag, they have the roasting date stickered on the back. Usually it's the day before it gets shipped. I've only had Boca Sunrise and Sumatran Sunset. I prefer dark roasts, so I wasn't a fan of Boca Sunrise (which was a medium roast). Sumatran Sunset is pretty good, though. Click below if you want 15% off your first purchase!

Get a discount on me


I haven't had too much experience with the different companies, but Marye from Kettle and Cup has done a ton of reviews, so go check her out!

I was going to explain the difference between lattes and cappuccinos and post two coffee syrup recipes, but I didn't think I had that much knowledge on coffee beans. Come back tomorrow for part two!

Saturday, August 23, 2008

I'm Crumbling Up!

Yes, another Dorie recipe. I made this during the beginning of August when mangoes were only $1 each. Mango is definitely a favorite of mine. I really don't know what made me pick this crumble. I looked up mango in the index, and it found me. This would be a perfect winter dessert because it gives such a warm Caribbean feeling with the mangoes and bananas, but it also works well in the summer with ice cream (preferably homemade vanilla).

For the streusel, I used walnuts instead of pecans and added 1 cup shredded coconut. It did take a little longer than 20 minutes to freeze, maybe 40 minutes or so. Then again, I only had room in the front of the freezer, so it might be colder in the back.

Tropical Crumble


For this recipe, you can check out page 418 in Baking: My Home To Yours.

Friday, August 22, 2008

Put The Lime In The Coconut...

Oh...my...goodness. I am so exhausted from helping freshmen move into their new home at my university, and I still have the welcome ceremony tonight and the summer book group discussion and dance party tomorrow night. At least I can blog while resting my feet.

Last week, I bought a bunch of limes because they were on sale. I have a horrible habit of buying food, THEN picking out recipes so sometimes I have trouble figuring out what I'm making or I'm one item short. When I'm in the mood for a baked good, I grab Dorie's book first and check the index. Under limes, coconut tea cake caught my attention. All I needed was to buy coconut milk, so I grabbed some on my next trip shopping.

Dorie says in her recipe intro that this is a "dry cake" because her friend really likes dry cakes (as in pound cake texture, not overbaked texture). Since this cake is "dry," it is perfect to serve with coffee or tea. If you are like my family and prefer the cake without a hot beverage, you may want to consider adding a simple glaze on top.

Dark rum is optional, and since I had some, I used it. I couldn't tell it was in the cake, but it may be one of those cakes where you can tell if it's not in the cake. I'll have to make this again (so many variations - lemon, orange, spice, sesame) and try it without the rum.

Also, it uses a bundt pan. I love bundt cakes!


Coconut Lime Tea Cake


This recipe can be found in Baking: From My Home To Yours on page 194.

Thursday, August 21, 2008

Beautiful Site Award

Thank you, Reeni for the Beautiful Site Award! She found my site through Foodbuzz and has told me she loves visiting my blog. You are too awesome.

Since Reeni gave this award to three people, I will pick three people. This isn't going to be easy since there are so many wonderful bloggers out there so please don't feel offended if you are not chosen, but I pick these three because I like their down-to-earth and yummy photography:

Megan's Cookin
Alwayz Bakin'
Obsessed With Baking

Wednesday, August 20, 2008

Cookie Post With Sweet Mary

I dedicate this to my best friend because she will be laughing too hard when she reads this post.

Last week, I tried making coconut and lime cookies from Sweet Mary. They turned into a disaster. They spread way too much and stuck to my cookie sheets.


Since Mary created this recipe, I asked her if she had trouble with her dough and maybe I was supposed to chill it before baking. She gave me some wonderful tips on why they may have spread. My butter may have been too soft, and using margarine probably made it spread even more. Then she suggested messing around with the flour and sugar so the structure of the gluten holds more. Then we decided both of us would experiment more with the ingredients and flavor and post our results.

I decided to mess with the temperature of the butter and dough while she messed with the flour. Since I ran out of coconut, I didn't use any. I froze my stick of margarine for 20 minutes before beating. I was going to do two variations - one with rum extract, one with vanilla extract. Since I didn't have time to make two separate batches, I just separated the dough into two bowls. Now, since I had to add the extracts before adding the flour, I also split the flour mixture in half. However, I'm not good at guessing. With the flour, I cut the measurements in half (1/4 cup flour in this bowl, 1/4 cup flour in that bowl, etc). For the batter, I just poured and guessed. Bad idea. There was more batter in the vanilla bowl than the rum bowl. When I added the flour to the rum bowl, the dough came together nicely. When I added the flour to the vanilla bowl, it seemed too wet. I added another 1/4 cup flour, but I was afraid to add too much. It was a little bit better but it didn't look nearly as good as the rum bowl. I chilled the dough in the fridge for 15 minutes before rolling it into balls. Then I put the cookie sheets into the freezer for 20 minutes while the oven preheated. I put them in the oven and baked for 10 minutes.

They weren't done, so I baked another 2 minutes. The rum batch came out nicely and were baked on the bottom rack.


The vanilla batch spread more than the rum batch, making them soft and hard to scrape off of the sheets. So I put them back in again, and again, and again. They weren't hardening up at all, so I pulled them out and let them cool before attempting to remove.


So I conclude that you can use margarine, although I'm wondering if butter would really make them not stick to the sheets. Keeping the dough cold does help minimize spreading. I wonder if they needed more flour?

Mary used more flour and a little more leavener and got a cake-like cookie. She prefers her first batch because they are flat and crisp yet chewy. We both agree that the lime overpowers the coconut (I used toasted coconut in my first batch). I also used white chocolate chips while she used dark chocolate chips.

Thanks Mary for doing this with me and for all of your help. We really do need to experiment more with this to get the ultimate coconut lime cookie.

Monday, August 18, 2008

The Ice Cream Bug Is Unleashed

Now that I know I can make ice cream without a maker, I've become addicted. Ok, so I've only made Blackberry Sour Cream Ice Cream and this vanilla ice cream, but I've been collecting all sorts of recipes. It figures - I discovered this technique last week and now I'm leaving for school in two days. No, I'm not going to make ice cream at school because I will be stuck eating the whole thing (my roommates actually watch what they eat haha).

A few months ago, Megan from Megan's Cookin mailed me a bunch of vanilla beans. I decided I was going to make real vanilla ice cream, so I turned to (who else?) Dorie Greenspan. This is by far the best vanilla ice cream I've ever eaten. Usually I pass on vanilla, but not this time. Guess that tells you something about most ice cream places.

My custard heated to 180F pretty quickly, so just be prepared to move fast so you don't overheat the mixture.

Dorie's Vanilla Ice Cream


You can find the recipe on p. 428 of Baking: From My Home To Yours. Has anyone tried Dorie's Honey-Peach Ice Cream on p. 437? I'm not a honey fan, but I might make this anyway.

Saturday, August 16, 2008

Sweet Summer Dessert

Before this summer, I have never picked strawberries. I had my mind set that there was no place to pick in western Pennsylvania. Then back in June, the newspaper showed pictures from a local farm's strawberry festival, and a family was featured on the front page picking strawberries. I did some research and found the farm. Sure, it's about 45 minutes from my house, but I thought the trip was worth it.


I think I took this picture after cutting up some berries because it isn't quite as full.

About a week before that, I bought a Hershey's cookbook for $2 at the used book store (oh I'm awesome). I remember flipping through and came across a picture for California Strawberry Log. My dad came over and asked what I was buying this time. I showed him the picture and he said you better be making that for me. He may have been kidding at the time, but I'm sure he didn't mind I took him seriously.

California Strawberry Log


3 eggs, separated
1/2 cup sugar
1/2 cup flour
1/3 cup unsweetened cocoa
1/3 cup sugar
1/2 tsp baking soda
1/4 tsp salt
1/3 cup water
1 tsp vanilla extract
1 Tbsp sugar
2 Tbsp + 3/4 cup powdered sugar, divided
2 cups (1 pint) cold whipping cream
1 tsp vanilla extract
3 cups sliced strawberries

1. Heat oven to 375F. Line 15 1/2x 10 1/2x 1 inch jelly roll pan with foil. Generously grease foil. In large bowl, beat egg yolks on high speed 3 minutes. Gradually add 1/2 cup sguar. Continue beating 2 minutes.

2. Stir together flour, cocoa, 1/3 cup sugar, baking soda, and salt. Add alternately with water and vanilla to egg yolk mixture, beating on low speed just until smooth.

3. In small bowl, beat egg whites until foamy. Add 1 Tbsp sugar and beat until stiff peaks form. Carefully fold into chocolate mixture. Spread batter evenly into pan.

4. Bake 15-18 minutes or until top springs back when lightly touched. Invert onto towel sprinkled with 2 Tbsp powdered sugar. Carefully remove foil. Immediately roll cake and towel together from narrow end. Place on wire rack to cool.

5. In clean large bowl, beat cream, 3/4 cup powdered sugar, and vanilla on high speed until stiff. Fold strawberries into 2 cups of whipped cream. Reserve remaining whipped cream for garnish. Unroll cooled cake and spread with strawberry mixture. Reroll. Spread remaining whipped cream on outside of cake. Refrigerate 1 hour or longer before serving.

Source: Hershey's Chocolate Lover's Cookbook, 1993 p. 110

Friday, August 15, 2008

Yummy Apricot Goodness

Some of you may remember me complaining about apricots being expensive. Well, the store must've heard me because shortly after, they went on sale for $1.99 a pound. I bought eight of these tiny babies and spent an afternoon looking for my cookbooks, deciding what fate they deserved. Eventually, I came across apricot upside-down cake from Donna Hay. If you don't own her book, get it. The photography is amazing, and it's all of your "sweet favorites redefined with modern ingredients, outlook, and style" (this back cover doesn't lie).

A word of caution - this involves making hot sugar syrup, so please wear gloves or oven mitts! I burnt my finger once, and it's worse than your average boiling water burn. Syrup boils at a higher temperature, so it is hotter than 212F (roughly 234F, depending on what you're making). Then on top of that, syrup sticks. You can wipe off boiling water easily, but it takes an extra few seconds to wash off syrup.

My cake came out somewhat soggy, so I'm not sure if the apricots were extra juicy or what. Or I just didn't let it sit long enough. Also, I had batter overflow since my pan was 9 inches instead of 9 1/2, so I filled the apricot pan up to the rim, then poured the remaining batter in an extra pan.

This is a great time to use your stand mixer because it requires at least 8 minutes of beating, but I made mine with my hand mixer, and it worked just the same. I got a nice work out.


Apricot Upside-Down Cake


1 1/2 cups flour
2 tsp baking powder
4 eggs
1 cup sugar
1 tsp vanilla extract
8 Tbsp butter, melted
12 apricots, halved and stones removed

Topping
1 cup sugar
1/2 cup water
5 Tbsp butter

1. Preheat oven to 325F. Grease 9 1/2 inch round cake pan.

2. For topping, place sugar and water in a saucepan over low heat until dissolved. Increase the heat and boil until the syrup is golden brown (this will take some time, be patient but don't leave the room because once it turns brown, it will burn quickly). Remove from heat and add butter. Pour into bottom of pan. Let set while making the cake.

3. Sift together flour and baking powder. Set aside. Beat eggs, sugar, and vanilla for 8-10 minutes or until thick and pale. Gently fold in flour mixture. Then fold in melted butter.

4. Place apricot halves cut-side down and close together in the topping in the pan. Spoon on the cake mixture and bake 65 minutes or until a toothpick comes out clean. Allow to stand 5 minutes then invert cake onto a plate (hence the name). Serve warm with cream.

Source: Modern Classics Book 2 by Donna Hay, 2003 p. 86

Thursday, August 14, 2008

Don't Let The Name Scare You

I love to broaden my food palette by using new ingredients. Whenever I was looking for a beets recipe, I came across beet gnocchi and beet empanadas but didn't have the ingredients at the time. Then when I went back to my local farm for more beets, I decided to make the empanadas and picked up some swiss chard as well. Then I stopped at the store on the way home and picked up some goat cheese. Now, when I explained what I was making to my dad (no way my mom or brother would eat these), he was a tad bit skeptical. He asked me what swiss chard was, was it lettuce, what goat cheese tastes like, etc. So I did some research.

Swiss chard is in the same species as beets, making it a perfect pair with beets themselves. The taste reminds me of spinach (after all, another name for chard is perpetual spinach), so if you are a spinach fan, swiss chard is for you. If you are looking for it in the produce area, it looks like giant leaves with red stalks and "veins" (I am not a botanist).

Now for the goat cheese. I know I've had it in my cooking class in high school, and I didn't remember anything bad about it, but I also couldn't remember what it tasted like. If you are looking for it in the store, your best bet is with the specialty cheeses (not cheese slices or shredded cheese unless that is how your store is set up). Goat cheese is made with goat's milk rather than cow's milk. It is popular in the Middle Eastern and Mediterranean areas because goats can survive in areas that cows can't. It is a very creamy cheese. Kinda like cream cheese except with a drier after taste. It is definitely an acquired taste. You either love goat's cheese or you hate it.

I absolutely loved the filling. In fact, I had lots of filling left over and I enjoyed that more than the empanadas themselves (probably because they didn't have much filling in them as opposed to a giant forkful from the skillet). I think the filling would make an excellent salad, just with bigger slices of beets and bigger chunks of swiss chard. I made the dough by hand, but you can also buy it premade at the store. I started making the empanadas using only one circle dough (fill the circle and fold in half), but it was getting late and I wasn't getting much filling into each one. So I decided to use two circles per empanada. Definitely freeze the dough for 15-30 minutes before baking to minimize leakage, especially if your kitchen is warm and your dough is getting soft.

Kudos to Laylita's Recipes for taking beautiful pictures that inspired me to make these empanadas. Next time I'll make my dough circles much bigger like she did.

Swiss Chard, Beet, and Goat Cheese Empanadas


For the recipe, please visit Laylita's Recipes.

Also, how adorable is Murray? This is him laying on a shopping bag after my family and I went to the Baseball Hall of Fame in Cooperstown, NY for the weekend. You see pictures of the actual museum here.


Tuesday, August 12, 2008

Tuesdays With Dorie - Blueberry Blackberry-Sour Cream Ice Cream


When I first read that this week's recipe was Blueberry-Sour Cream Ice Cream and that those who don't own an ice cream maker can make something from the past, I immediately thought, nope not doing ice cream, let's see what I can make from past picks. Then Laurie (the wonderful creator of this group <3) posted two links on how to make ice cream by hand. I knew you could do the plastic bag way and the coffee can way, but those involve rock salt or a ton of table salt. But I clicked on David Lebovitz' link anyway. After reading that tutorial, I immediately wanted to go in the kitchen and give it a try. So I decided to actually look at Dorie's recipe. First, no eggs. I use a ton of eggs in baking, so we are always running out, and well, grocery bills aren't exactly pleasant. Just knowing that there are more eggs for other recipes made me happy.

Then I ran into one slight problem - I hate blueberries. Just looking at blueberry pie makes me queasy. Blueberry oatmeal literally makes me sick. I once had a dried blueberry in my spinach bagel (by accident), and when I tasted it, I immediately spit it back out (talk about your reflexes). The only time I can eat blueberries without getting a bad stomach reaction is when it is mixed with pomegranate because one time, I had blueberry pomegranate juice and another time, I had blueberry pomegranate applesauce. So needless to say, I wasn't going to make blueberry ice cream. Well, why not use another berry? I went on a hunt, ON A HUNT, for raspberries, and the local farm nor the grocery stores had raspberries. I didn't know the window for raspberry season was tiny or I would've taken more advantage *grumble grumble*. So I ended up buying blackberries at the store.

So after my berry hunt, I am finally ready to make some ice cream. Honestly, I didn't think the method was going to work. I thought I would still have some ice crystals, but nope, it all worked out fine. Towards the end of freezing, I was watching CSI so I didn't exactly go out and mix it every 30 minutes, maybe every 45 minutes or so. I will warn that there was too much sour cream for my family and I to handle, so next time I would reduce the amount from 3/4 cup to 1/2 cup sour cream.

Blueberry Blackberry-Sour Cream Ice Cream


Thanks to Dolores from Chronicles in Culinary Curiosity for picking this week's recipe. For the recipe, you can look in Baking: From My Home To Yours on p. 434 or visit Dolores' blog for the recipe.

Monday, August 11, 2008

Thank You, Foodbuzz!

I never got the chance to thank Foodbuzz for the wonderful tote bag they mailed to all of their featured publishers. I haven't been with another advertising host (if that's what you want to call it), but they treat me well with friendly emails and awesome goodies. They gave me a box of mini business cards when I first signed up with them. I still have yet hand most of them out. Any creative ideas?


I used the tote at my local farm and picked up an eggplant, a red onion, some beets, swiss chard, and tomatoes. I've never had swiss chard before, but I found a recipe that pairs it up with beets and goat cheese. If it is a success, stay tuned for it.

If you are interested in becoming a FB featured publisher, leave me a comment or send me an email. I can then tell you who to contact for more information (plus I get a bonus for refering you). It doesn't cost you anything, just a spot on your blog for their one banner. Plus for so many clicks of the banner, you get paid! It's nothing huge, but with prices being so high, it can matter so much.

Tuesday, August 5, 2008

Tuesdays With Dorie - Black and White Banana Loaf


I don't know how to explain it. You flip through Dorie's book and drool over the recipes and photographs. Everything sounds so yummy, and when you have an ingredient you need to use, usually you can find something in the index. So how could this baking bible disappoint any baker? Perhaps it was my tastebuds or perhaps fresh nutmeg really does make a difference, but I didn't enjoy the Black and White Banana Loaf chosen for this week. The nutmeg is very distinct. If you hate nutmeg, you will not like this bread. But I don't hate nutmeg. Maybe because I was expecting more chocolate flavor (I used semi-sweet) or even the rum. I barely tasted the Bacardi Puerto Rico rum I used. It smelled (and tasted) good when I made the banana mixture, but since alcohol evaporates after baking, I couldn't tell anymore. The rum was a golden rum, not a dark rum. Maybe I'm the one who messed up and the recipe is perfectly fine. After all, my bread was flatter than usual banana bread. And why did Dorie list this as a cake and not bread? Well, if I didn't do the baking right, at least my marbling looks like marbling! I'm quite proud of my photograph too.


Black and White Banana Loaf


Ashlee from A Year in the Kitchen has chosen this week's recipe. She also had trouble with her loaf, also barely tasting the rum. My batter wasn't runny, though. She tweaked the recipe, so please visit her lovely blog for suggestions and the recipe. If you own the book, the recipe can be found on page 232.

Friday, August 1, 2008

When The Craving Strikes Out Of Season

For 11 years, I was a Girl Scout. I started out as a daisy in kindergarten, quit, then restarted as a brownie in 3rd grade. I don't remember why I quit, but apparently I changed my mind and wanted to rejoin. Every year, my family would buy several boxes of cookies, mainly Tagalongs and Thin Mints. Even though the names never made sense (Samoas? Do-si-dos?), you could never forget them. According to fellow cookie lovers, the company switched to a different bakery (if you want to call it that). I haven't had any this past year, but I was told several times there was a difference in the taste, and it wasn't for the best. Plus it was expensive for the amount of cookies in each box. So why buy something when it is cheaper (and slightly healthier) to make it yourself? A long time ago, Nicole from Baking Bites created several Girl Scout recipes, including samoas, do-si-dos, and tagalongs. Thanks to her, you can enjoy homemade Girl Scout cookies any time of the year!

I decided since I had coconut and caramel I needed to use, I made samoas. I really recommend making the base with butter, not margarine because the taste with margarine wasn't cutting it. Also, once the chocolate on the bottom hardens, they will peel easily from the parchment paper. To speed up the process, you can place them in the freezer until hardened.


Samoas


Thank you, Nicole for taking the time and creating the homemade version! For the recipe, please visit Nicole's blog. If in the future the page disappears, email me because I have it saved in one of my binders.