Showing posts with label Chocolate. Show all posts

Tuesday, January 19, 2010

Tuesdays With Dorie: Chocolate Oatmeal Almost-Candy Bars


Phew I think my book was getting dusty after not being touched for a few months. I seriously was going to do last week's, but then I realized it was Wed. and I missed it haha So now I'm back with Dorie's Chocolate Oatmeal Almost-Candy Bars. I made these late last night, so I couldn't eat them until this morning. This is what I had for breakfast with my coffee.


It took me a long time to make this bc I had to shell the peanuts. Also, I didn't measure out the raisins, and I definitely didn't put enough. I love chocolate and raisins together, so I'll make sure to take care of that next time.


Thanks Lillian of Confectiona's Realm for choosing this week's recipe! You can find the recipe on p. 114-115 of Dorie's Baking: From My Home To Yours or on Lillian's blog.

Friday, January 15, 2010

Chocolate Surprise Cupcakes

Tada! I'm alive! Target stole my soul for the holiday season, but now that my hours are cut (and really no clue how I'm going to pay the bills), I have some more time in the kitchen. Slowly my cooking spirit is coming back, but eh we'll see.

Hope everyone had a nice holiday. Mine was pretty decent. I got a kitchen pantry to store all my junk, so now my counters are not cluttered with the bread maker, George Foreman grill, and random pans. I also got Julie Hasson's 125 Best Cupcake Recipes, which I have had on my wish list since forever. Can't believe my parents actually spent $20 on it though, but it's super duper hard to find it used.


I decided to make cupcakes the other night bc I have so many cupcake liners. Christmas may have passed, but I do have winter ones I got on clearance last year, AND they come with matching toppers. I chose Julie's Chocolate Surprise Cupcakes bc I love love LOVE marshmallows! As you can see, some of them peek out after you cut out the middle. You're supposed to let them melt a little and squish the top down, but I was too tired to stand and wait for that. I opted to just cover the tops with frosting lol

I had trouble frosting them. Since I ran out of pastry bags, I used sandwich bags. Normally this is fine, but I guess I filled the bags too much, and two bags ripped open. Fortunately, my bff bought me this cake decorating press thing (think cookie press but with icing tips) so after making a huge mess and wasting some of the icing, I managed to finally frost them. And let me tell you, this frosting is cupcakelicious!! So what if my sprinkles don't match? They taste pretty good to me!

Chocolate Surprise Cupcakes


1 cup flour
1/2 tsp baking powder
1/4 tsp baking soda
1/4 tsp salt
1 cup sugar
1/4 cup oil
2 egg whites
1 tsp vanilla
2 oz unsweetened chocolate, melted and cooled slightly
2/3 cup buttermilk
2 tbsp chocolate cream liquer OR chocolate syrup
12 large marshmallows OR handful of mini ones

Chocolate Fudge Frosting
1 1/2 cups powdered sugar
3/4 cup cocoa powder
1/2 cup butter or baking margarine, room temp
2 tbsp chocolate cream liquer OR milk
1 tbsp coffee OR milk

1. Preheat oven to 350. Line muffin pan with 12 liners. In a small bowl, mix together flour, baking powder, baking soda, and salt.

2. In another bowl, beat together sugar and oil until well combined. Add egg whites, one at a time, beating well after each addition. Beat in vanilla and chocolate. Alternately beat in dry mix and buttermilk. Beat in chocolate syrup.

3. Scoop into liners. Bake 20-25 minutes or until tops spring back and toothpick comes out clean. Let cool in pan for 5 minutes. Remove from pan. While cupcakes are still hot, cut out the middle of each. Insert a marshmallow. If they stick up, try squishing them down while they soften from the heat. If that doesn't work, you can cover it with frosting. Or just use a handful of mini marshmallows.

4. Frosting: Beat all frosting ingredients together until smooth. Frost cupcakes after they are completely cooled.

Makes 12 cupcakes

Source: 125 Best Cupcake Recipes by Julie Hasson, 2005 p.28

Tuesday, September 29, 2009

Tuesdays With Dorie - Chocolate-Crunched Caramel Tart


FINALLY! After waiting about 16 months, it is now my turn to host Tuesdays With Dorie. Pictures really sell me on a recipe. Although there are many great recipes without pictures, I tend to pick a recipe based on the picture. I've had my eye on Dorie's Chocolate-Crunched Caramel Tart for ages. The caramel is what really sold me. I love the combination of caramel and salted peanuts, not to mention the chocolate ganache. I used semisweet instead of bittersweet chocolate and salted peanuts.


I feel like such a bad hostess because I couldn't get a decent picture of the tart. For starters, the crust doesn't look like a tart crust. Seems like even though I used frozen butter and froze the crust before baking, the edges melt. Do I not press the crust in thick enough? Is it because I mix by hand and not with a food processor? Taste wise it's delicious.


I made this recipe twice. The first time I used my 11 inch tart pan. Mixing the peanuts into the caramel made it really hard to spread, so the caramel didn't make it to the edges. That and the tart is 2 inches bigger than what Dorie made. The peanut halves were also too big.


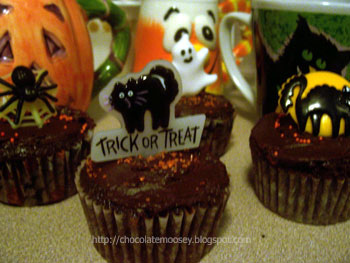
The second time I used baby tart pans, so I cut the recipe in half. This was my first time using the pans. The crust shrank like usual, and that really frustrates me. Shrunken crust makes it harder to remove from the pan. With the caramal layer, I decided to use baby food processor to chop the peanut halves and sprinkle on top of the caramel instead of mixing it in.

I really do love this recipe, but I still have ways to go before I can get the crust perfect. Hope all you TwDers enjoyed dessert this week.

Chocolate-Crunched Caramel Tart

Caramel
Scant 1/2 cup heavy cream
1/2 cup sugar, sifted
1 tablespoon corn syrup
2 tablespoons salted butter, cut into 4 pieces, room temperature

Ganache
8 oz bittersweet chocolate, finely chopped
1 cup + 2 tablespoons heavy cream
4 tablespoons unsalted butter, cut into 4 pieces, room temperature

3/4 cup honey-roasted peanuts, coarsely chopped
1 9-inch tart shell made with Dorie's Sweet Tart Dough (p.444), fully baked and cooled

Getting Ready: Because you have to work quickly once the sugar caramelizes, you should have all the ingredients for the caramel measured out and at hand before you start. Also have a medium heatproof bowl at hand to hold the hot caramel.

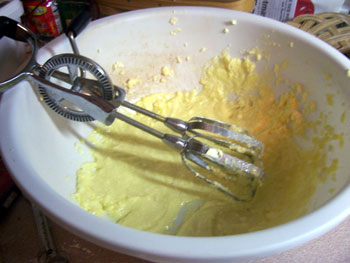
To Make the Caramel: Bring the heavy cream to a boil.

Meanwhile, put a medium skillet, preferably nonstick, over medium heat and sprinkle in about 3 tablespoons of the sugar. When it melts, stir it with a wooden spatula or fork and sprinkle over another 3 tablespoons. When that sugar is melted, add the remaining 2 tablespoons sugar - the sugar in the pan may already have started to color, and that's fine. Stir in the corn syrup and boil the syrup until it reaches a deep caramel color - it will probably begin to smoke, and that's normal.

Stand back and stir in the butter. The caramel will bubble furiously and may spatter, so make sure you're away from the action. When the butter is in, add the warm cream - the caramel will bubble furiously again. Lower the temperature just a tad and let the caramel boil for just 2 minutes (226F on candy thermometer). Pour the seething caramel into the heatproof bowl and set aside while you make the ganache.

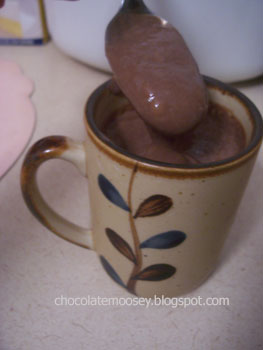
To Make the Ganache: Put the chopped chocolate in a heatproof bowl and have a whisk or a rubber spatula at hand.

Bring the cream to a boil. Then pour half of it over the chocolate and let sit for 30 seconds. Working with the whisk/spatula, very gently stir the chocolate and cream together in small circles. Pour in the remainder of the cream and blend it into the chocolate. When the ganache is smooth and shiny, stir in the butter piece by piece. Don't stir any more than you must to blend the ingredients - the less you work it, the darker, smoother and shinier it will be.

Cover the ganache with plastic wrap, pressing it against the surface to create an airtight seal. Set aside at room temperature for the moment.

To Assemble the Tart: Stir the peanuts into the caramel. If the caramel has cooled and is too thick to spread easily, gently warm in the microwave in 3-second spurts. Spread the caramel over the bottom of the tart shell; you'll have a thin layer. Refrigerate the tart for 15 minutes to set the caramel.

Check the ganache. If it has thickened, warm it in 3-second spurts. Rap the bowl to break any surface bubbles, pour the ganache over the caramel and jiggle the pan to even it.

Refrigerate for 30 minutes - no longer - then keep it at room temperature until serving time.

Baking: From My Home To Yours pages 355-357

Sunday, September 13, 2009

Rocky Road Brownies

Here's a tip I learned over the years. Just because your cookbook says holiday cookies doesn't mean you can only make them for the holidays. In fact, nothing about the recipes makes them holiday only (except maybe pumpkin for fall cookies and the way cut-out cookies are decorated). Take these rocky road brownies for example. The book is called Grandma's Christmas Cookies, but give me one good reason why these should be made only for Christmas. In fact, I bet if I didn't tell you the title of the book, you never would have known. Personally, holiday cookbooks were invented so if I were making a cookie tray, having company, or invited to a cookie exchange (someone please invite me!), I don't have to look very far for an "elegant" recipe. By elegant I mean more than your traditional chocolate chip cookie.


Fact - I hate, hate, HATE the lighting in my kitchen. Another fact - I love marshmallows, which is why I picked these brownies. That and the picture in my book looked amazing. Plus I had peanuts leftover. The topping looked amazing, and I tried to capture that in a photo, but it was hard because the brownies are very gooey. It is best to eat these cold because of the topping, but they can also be eaten at room temperature (provided that it's not a hot summer's day).

Rocky Road Brownies


1/2 cup butter or margarine
2 squares (1 oz each) unsweetened chocolate
3/4 cup sugar
1/2 cup flour
2 eggs
1 tsp vanilla
1/4 cup salted peanuts, chopped

Topping
2 Tbsp butter or margarine
1 1/2 oz cream cheese
1/2 square (1/2 oz) unsweetened chocolate
2 Tbsp milk
1 1/4 + 2 Tbsp powdered sugar
1/2 tsp vanilla
1 cup mini marshmallows
1/2 cup salted peanuts

1. Preheat oven to 350F. Line 8x8 pan with greased foil.

2. In a saucepan, melt butter and chocolate, stirring constantly. Add sugar, flour, eggs, and vanilla; mix well. Stir in peanuts. Spread into baking pan. Bake 20-25 minutes or until brownie starts to pull away from sides of pan. Cool completely

3. Topping: In another saucepan, combine butter, cream cheese, chocolate, and milk. Heat until melted, stirring constantly. Remove from heat. Add sugar and vanilla. Beat with mixer until smooth. Stir in marshmallows and peanuts. Immediately spread over cooled brownies. Cool completely before cutting. Store in refrigerator.

Source: Grandma's Christmas Cookies 1997 p.62

Tuesday, August 11, 2009

Tuesdays With Dorie - Brownie Buttons


Ever have a dream about food? Ironically, two days before making Dorie's Brownies Buttons, which was this week's pick, I had a dream about baking brownies. Or at least attempting. It was 2 AM and I was melting together chocolate and butter. Once I realized it was going to take 20 minutes to bake, I decided I wanted to go back to sleep and put the pot in the fridge, thinking oh it's just butter and chocolate. It'll be fine until tomorrow. Scary thing was this dream felt real. I was in my kitchen, at my stove, using my pot. I even made sure to check the kitchen for any evidence of brownie baking when I woke up haha

Here's the crazy part. I had a bar of baking chocolate in the cupboard, which I was going to use for these buttons. When I went for it, I couldn't find it. I brought everything out. WTF? Where's my chocolate?! I started thinking but could not come up with anything made recently that used my chocolate. Possible conclusions are my brother ate it, having no job really does affect my memory, or I used it to bake brownies in my dream. Considering that last one is just silly and my brother never goes in that cupboard, I'm left with my memory failing. I even looked through my camera pictures, but nothing sticks out.

I couldn't run to the store (or make anyone run to the store), so I melted semi-sweet chocolate chips. Don't know if I had enough because I don't have a kitchen scale. I kinda want to get one of those. Anyway, I filled 16 mini cups like Dorie said. Next time, I will probably make 12 because the buttons were so tiny and barely rose.

Did you know peanut butter chips do not melt very well? I was going to dip half in pb, half in semi-sweet chocolate. When I melted the pb chips, it just was not smooth. While they were hardening in the fridge, I got the brillant idea of sprinkles. Makes them much more fun.


Thanks to Jayma of Two Scientists Experimenting in the Kitchen for this week's pick. I hope she didn't have some crazy dream about baking these. You can find the recipe on pages 106-107 in Baking: From My Home To Yours or on Jayma's blog.

Tuesday, July 7, 2009

Tuesdays With Dorie - Tribute To Katharine Hepburn Brownies


This week's TwD was chosen by non-member Lisa from Surviving Oz because she won the logo contest. I almost didn't make these because I was tired yesterday, but I haven't done a TwD in awhile. The nice thing about making brownies is you pretty much mix everything together in one pan then transfer and bake.

If you are friends with me on Face Book or read the P&Q section on the TwD site, you probably saw that I almost had a disaster. This is what I wrote:

How Not To Make Brownies: Put flour in small bowl. Make brownie batter. Put pan in oven. Lick spoon. See bowl of flour on counter. Frantically pull out hot pan without oven mitts. Burn finger. Attempt to stir in flour. Rip foil. Pour into bowl. Replace foil. Replace batter. Put back in oven. Reset timer. Continue to lick spoon.

Since there was only 1/4 cup flour, I put it in a cereal bowl rather than a mixing bowl. I guess I thought I added it with the sugar or something because I noticed after putting it in the oven that I forgot about it. Oops! Besides a few extra dishes, I recovered...


...or so I thought. Apparently when Dorie says use parchment paper, she really does mean parchment paper and not foil. Since I had to hurry up and put new foil in the pan, I guess I didn't spray as much as I should. I thought I did, but my brownies argue otherwise. I refrigerated them for about 30 minutes which helped with the gooey factor, but they still stuck to the foil.


Tastewise - don't let the instant coffee fool you. I will admit I am a coffee snob. If it's not freshly-grinded coffee, I don't want it. I can tell when you have Folger's or Maxwell House because it just has that taste, but what's worse than stale coffee is instant coffee. I don't completely hate it - it reminds me of my stays at hostels in the UK. Not all hostels had a pot of coffee for breakfast, so my friend Shannon packed instant coffee, tea bags, and sugar while we were traveling. However, I would never willingly make myself a cup of instant coffee. In fact, I can't really explain why I have instant coffee in the cupboard. I think it was a free sample pack or something. Anyway, fellow TwDers assured me the coffee is there to enhance the chocolate, and you can't tell that much. Dorie called for 2 tsp but I used one serving packet, so maybe 1 tsp? I could still taste it, but it brought out the chocolate rather than oh I taste coffee and chocolate. I also added the optional cinnamon, but I can only taste a hint of it.

To sum things up, I would definitely make these again, as long as they don't stick or I forget the flour again. Thanks to Lisa for picking this recipe! You can the recipe on pages 96-97 of Baking: From My Home To Yours or at Surviving Oz.

Saturday, July 4, 2009

Warning - I Gots Me Some Brownies

...ok I lied. I don't have these brownies anymore because I made them last week to take over a friend's house. A group of us have been hanging out more and more lately, so I decided I wanted to bring some treats over so I'm not showing up at my friend's house empty-handed. I asked for requests, and one was caramel brownies. I don't have any caramel and saw I had two open jars of peanut butter, so I decided I was doing PB instead.


I decided to make Nestle Tollhouse's brownies from their cookbook. I already made these brownies before but without the PB swirled in. As you can imagine, these brownies didn't last very long, mainly because I ate most of them but shhhh. The measurements are slightly weird because I cut the recipe in half for an 8x8 pan.

Chocolate Peanut Butter Fudge Brownies

1/2 cup + 1/3 cup sugar
1/4 cup (1/2 stick) butter or margarine
1 Tbsp water
2 oz. unsweetened baking chocolate OR 6 Tbsp cocoa + 2 Tbsp oil
1 egg
1 tsp vanilla
2/3 cup flour
1/8 tsp baking soda
1/8 tsp salt
1/4 cup peanut butter
1 Tbsp + 1 1/2 tsp sugar
1 Tbsp milk

1. Preheat oven to 350F. Grease 8x8 pan or line with foil.

2. In a saucepan, melt sugar, butter, and water. Add chocolate and stir until combined. Beat in egg and vanilla. Gradually add flour, baking soda, and salt. Do nout pour into pan just yet.

3. In a microwavable bowl, combine peanut butter, sugar, and milk for 45 seconds or until smooth. Pour brownie batter into pan. Spoon PB mixture on top; swirl in with a knife.

4. Bake 20-25 minutes. Toothpick should have a few crumbs on it. Cool completely in pan before cutting into bars.

Makes 1 dozen.

Source: Nestle Tollhouse Best-Loved Cookies 1995, p. 83


Just make sure you share. Too many brownies could result in breakage.

Monday, June 8, 2009

Dorie's Soft Chocolate and Berry Tart

Did anybody else watch The Next Food Network Star premiere last night? I'm excited for a new season! I don't have a favorite yet, but I think Brett looks a lot like Adam from last season. While watching the promos, I did favor Michael, but I'm not too sure after hearing him talk. It does give him lots of character, but I'm not sure if I could watch a whole show with him. Melissa looks like she is going to explode with energy.

Also, I saw promos for Dinner: Impossible with Robert hosting again. I must admit, I enjoy Robert as the host much better than Michael Symon, although I'm really surprised they are letting him come back after he supposedly lied about his credentials.


Enough about tv. Time for dessert! I recently received a tart pan for my birthday a few weeks ago. I was originally going to do Dorie's Chocolate-Crunched Caramel Tart on page 355, but I also saw the Soft Chocolate and Raspberry Tart on adjacent page. Since I had a container of blackberries to eat, I decided to make the berry tart. Now, the recipe calls for a 9-inch tart pan. Mine is 11 inches. The crust recipe provided does make enough to cover my pan, but the berries definitely did not. I'll have to make sure to buy two containers next time. I would've had enough if mold didn't exist. Grr.


I don't want to post the recipe because although this isn't a Tuesdays With Dorie pick, I still want to support Dorie and her publishing company. Besides, you really should buy this book. For those of you who do own this book, you can find the tart recipe on page 354 of Baking: From My Home To Yours.

Tuesday, April 21, 2009

Tuesdays With Dorie - Four Star Chocolate Bread Pudding


This week's recipe was Dorie's Four Star Chocolate Bread Pudding. I made this for Easter dessert a few weekends ago. Unfortunately, I had to leave for school that evening, so I cut the dessert while it was still hot instead of letting it cool. I ate a small spoonful, but since I was full, I wrapped it in foil and took it to school. Whenever I ate it a few days later, there was oil "leaking" from the bottom. Not sure if that was the recipe or the fact I wrapped it while it was still hot.


I can't really give my opinion since a cooled bread pudding was probably more set and easier to cut than scooping out still hot pudding. It tasted good, I know that much.


I've also been busy wrapping up my final semester (graduation in less than two weeks - eek!), so I didn't read the problems and questions thread on TwD. Some people did use donuts and cinnamon rolls instead of stale bread. Very interesting! For the recipe, check out pages 410-411 of Baking: From My Home To Yours or at Upper East Side Chronicle by Lauren.

Since I am graduating on May 2, anyone who works in video production, please hire me? I'll bake lots of goodies for you! Ok thanks! haha I hope I don't have to drop out of TwD for not being able to afford ingredients this summer...

Tuesday, February 3, 2009

Tuesdays With Dorie - World Peace Cookies


Tidbit 1 - Never eat cottage cheese and drink coffee together. Just don't do it.

Tidbit 2 - Never underestimate Pittsburgh.


Murray enjoying the Superbowl


Tidbit 3 - Never pass up the opportunity to bake Dorie's World Peace Cookies. Despite the name, I never expected this recipe to be that great. I just expected another chocolate cookie. Wrong. These are chocolate melt-in-your-mouth shortbread-like cookies. Amazing.


I don't know why, but cookies are always the hardest thing for me to bake. I can never get them the correct shape. Sometimes they stick to the cookie sheet, throwing me into a rage. Several bakers suggested that I buy parchment paper. However, when I was in Wal Mart, I found 2 silcone mats on clearance for $7. Based on my online shopping, I knew that was a great price. I would probably spend $7 in parchment paper anyway. Plus I was helping the environment. I must say if you don't have silcone mats, go to the store right now. You will save so much frustration. Plus mine has a ruler and little circles for cookie placement. Isn't that awesome or what?


One problem I did have with this recipe is the dough crumbled a little too much. I think I might not have mixed the dry ingredients as much as I should have, but I was afraid of overmixing. I did manage to form the dough into blobs, so it wasn't a total loss.

World Peace Cookies


Thank you Jessica of Cookbook Habit for picking this recipe! I don't think I would have picked it on my own. You can find the recipe on page 138 in Baking: From My Home To Yours or on Jessica's blog

Wednesday, January 14, 2009

Mini Makes It Cuter

Gah I am freezing right now. The thermostat claims the apartment is 70 degrees, but my room definitely is not. It's on the edge and on the third floor, so I get hit by twice the wind as opposed to two of my roommates. To make it even better, they are calling for 2-4 MORE inches of snow. It wouldn't be so bad if the sidewalks weren't slushy and muddy and the construction workers finished working on the sidewalks during break and not during classes. Sad part is they started construction back in November.

Anyway, for Christmas I got a mini muffin pan. I knew it was coming because I didn't ask for much and I picked it out haha I don't know why, but mini muffins seem more fun and appealing than regular muffins. Plus if I need to bring goodies to a club meeting or a friend's party, I can whip up 24 mini cupcakes or brownie bites in no time. Or those cheesecake bites. To convert a regular-sized muffin/cupcake to mini-sized, multiply the quantity by 4. For example, if the recipe makes 12 muffins, multiply 12 by 4 and you will get 48 mini muffins.


I figured for breakfast at school, I can make mini muffins to snack on. I chose Dorie's Chocolate Chunk Muffins because I had some bittersweet chocolate to use. I imagine you can sub your favorite chocolate because these muffins definitely reflect the 70% cacao I used. They were also a little dry, so they are meant to be eaten with coffee or tea. The recipe says to add chopped chocolate, but I think mine melted. I'll use chocolate chips next time because they keep their shape after baking.


Chocolate-Chocolate Chunk Muffins


For the recipe, refer to page 19 of Baking: From My Home To Yours. I really do encourage everyone to buy the book, but if you really want the recipe, email me.

Saturday, January 10, 2009

Ice Cream Sundaes...Without The Ice Cream

I love sprinkles. Although I don't use them often, I have an obsession on buying sprinkles and cupcake liners, especially after the holidays when they are on sale. I can't tell you how many Christmas liners I ended up buying this year :X I wanted to use my rainbow nonpareils, but instead of making cupcakes, I made sundae cookies. I'm not a good decorator, but I thought I did a nice job making these cute.


I printed this recipe last year from Cookie Madness and stored it in one of my many binders. As I was going through it, I was in the mood for a marshmallowy treat. Plus I had maraschino cherries to use from my cherry chocolate blossoms. The original recipe didn't call for sprinkles, but I thought the addition made them more like a sundae. I cut the recipe in half and got a dozen cookies.


Sundae Cookies


3/4 cup flour
1/4 tsp baking soda
1/4 tsp salt
1/3 cup brown sugar
1/4 cup butter
1 Tbsp water
1 1/2 tsp oil
1 tsp baking powder
1/2 tsp vanilla
3 Tbsp cocoa powder
1 Tbsp oil
1 Tbsp milk
2 Tbsp cherry juice
2 Tbsp maraschino cherries, chopped
6 large marshmallows, cut in half
3 oz semi-sweet chocolate
2 Tbsp butter
2 tsp corn syrup
1/8 tsp vanilla
Sprinkles
12 whole maraschino cherries

1. Preheat oven to 350F. Line a cookie sheet with foil or parchment paper.

2. Combine flour, baking soda, and salt. Set aside. In another bowl, cream sugar, butter, water, 1 1/2 tsp oil, baking powder, and vanilla until well blended. Add cocoa and 1 Tbsp oil; mix well. Add milk and cherry juice. Add dry ingredients. Stir in cherries.

3. Drop by teaspoon onto cookie sheet. Bake 12 minutes. As soon as they come out, press a marshmallow half on top of each cookie. Let cool until sturdy enough to transfer to cooling rack.

4. In microwave, melt butter, Stir in chocolate and corn syrup. Microwave in 10 second intervals until melted and combined. Stir in vanilla. Spoon over each marshmallow, covering it completely. Top with sprinkles and a cherry.

Makes 12 cookies.

Source: Cookie Madness

Monday, December 15, 2008

The Spirit of Cupcakes

Well, I'm home from school for the holidays, although it doesn't feel like it. I'm slowly regaining my spirit after an incident last week, but that's life for you. And although lately a lot of my baking has been a flop, I did somewhat make cupcakes. I put too much batter in because the overfill resulted in a flat and brittle top. At least they tasted good, especially with peanut buttercream on top.

I halved the recipe and got 6 cupcakes. The recipe below makes 12 cupcakes and without leftover frosting. To halve the 3 eggs, use 1 egg, 1 Tbsp water, 1 1/2 tsp oil, and 1 tsp baking powder.

Also, did you know maraschino cherries get their flavor from almond extract? Seriously. When you come across almond extract, smell it. If you are not a fan, sub the almond for more vanilla.

Chocolate Brownie Cupcakes with Peanut Buttercream


Cupcakes
3/4 cup flour
1/2 cup cocoa powder
1 tsp baking powder
1/4 tsp salt
2/3 cup sugar
2/3 cup brown sugar
3/4 cup butter, melted and cooled slightly
1/2 tsp vanilla
1/2 tsp almond extract
3 eggs
2/3 cup chocolate chips

Peanut Buttercream
2 2/3 Tbsp peanut butter
1 1/2 cups powdered sugar
1/2 tsp vanilla
2-3 Tbsp milk

1. Preheat oven to 325F. Line muffin pan with paper liners.

2. Mix together flour, cocoa powder, baking powder, and salt.

3. In another bowl, beat together both sugars and butter until smooth. Beat in vanilla and almond extracts. Add eggs, one at a time, beating well after each addition. Add flour mixture, stirring by hand until combined. Stir in chocolate chips.

4. Scoop batter into prepared liners. Bake for 28 minutes or until a toothpick comes out with a few crumbs and a little melted chocolate. The tops will not spring back when touched. Let cool for 10 minutes in pan before removing to cooling rack.

5. Peanut Buttercream: Cream peanut butter until light and fluffy. Beat in sugar and vanilla. Add milk until desired consistency is achieved. Frost cooled cupcakes.

Both recipes make enough for 12 cupcakes without leftover frosting.

Sources: Cupcake, Frosting


Evil alien cat?


Don't know if you can tell, but Murray's eyes are closed.

Sunday, November 30, 2008

A Nice, Fluffy Dessert

I had leftover whipping cream from making pie, so I had to find a recipe that didn't leave me with extra egg whites. However, it did leave me with lots of chocolate mousse. One thing I don't like about this recipe is after you beat the cream, you beat the egg whites. You have to make sure to wash the beaters and make sure they are 100% dry. Otherwise, the eggs won't form soft peaks. I would say do the egg whites first, but then they would deflate by the time you finish the cream. Or at least that's my theory.

I think I need this to get me through this week. The week before finals is always killer for me because my professors love making projects due this week instead of during finals week. Why? Don't know. It's been like that all four years. And I have to clean out my freezer before winter break. I have salmon, swordfish, beef, ground beef, and chicken plus frozen vegetables and Hot Pockets. Not to mention leftovers from Thanksgiving. Usually, I'm low on food. This week I have too much to eat! haha


Chocolate Mousse


7 oz dark chocolate
5 Tbsp butter
4 eggs, separated
1 cup heavy whipping cream
2 Tbsp powdered sugar

1. Melt chocolate and butter together until smooth. Add one egg yolk at a time, beating until well combined. Set aside.

2. Whip cream until soft peaks form. Set aside.

3. Whip egg whites until soft peaks form. Add sugar; whip until mixture is thick and glossy (but still soft peaks).

4. Gently fold cream into chocolate mixture. Then fold in egg whites. Refrigerate at least three hours before serving.

Serves 6-8.

Source: Donna Hay's Modern Classics Book 2, 2003 p. 106

Thursday, November 13, 2008

I Hate Pittsburgh Sometimes...

Why is Pittsburgh so hard to navigate? This past weekend is the third time I got lost coming home. My dad told me when coming home, get on the Parkway. Parkway = 376, so I'm driving home, looking for the 376 sign. Nobody told me 376 turned into 279 on the way there, so technically I was looking for 279 which would later turn into 376. Ok so it was sorta outside the city. The second time I got lost, I was inside the city and couldn't figure out how to get back onto 376 because Pittsburgh does not post enough signs. And when I figured out I missed the turn, it took me about 10 minutes to make a U-turn because the city is not built like a grid. In other words, you can't go the next block down and turn around because you physically can't. Seriously, are other cities this complicated?

At least I was with my best friend, and she had Verizon Navigator. However, it does not work fast enough because we kept getting "Recalculating route...recalculating route...make the next legal U-turn." Thanks, Verizon, thanks. I somehow managed to get back home an entirely different way, all because I recognized Walgreens. That is the second time Walgreens saved me. The first time I got lost, I was coming home from my internship in Pittsburgh and took a detour because of construction on 376 (see a pattern here?). I was on the phone with my mom for directions because it was unexpected. She told me to go straight, but she failed to tell me there was a Y in the road and I should yield right then go straight. I somehow made it to an intersection with (a different) Walgreens and knew how to get home.

Moral of the story - pack these no-bake cookies because you will get lost coming home from Pittsburgh. You can't go wrong with chocolate and peanut butter! haha

No-Bake Cookies


2 2/3 cups sugar
2/3 cup milk
1/3 cup cocoa
5 1/3 Tbsp margarine
3/4 cup creamy peanut butter
1/2 teaspoon vanilla
3 1/2 cups quick oats

Mix sugar, milk, cocoa, and margarine. Bring to a boil; boil 1 minute. Remove from heat and add vanilla and peanut butter. Stir in oats. Drop by spoonfuls onto cookie sheets lined with wax paper. Freeze or refrigerate for about 30 minutes or until firm.

Makes 3 dozen.

Source: Recipe Zaar

Tuesday, October 28, 2008

Tuesdays With Dorie - Chocolate Chocolate Cupcakes


This week's recipe was cleverly chosen by Clara of I Heart Food 4 Thought. She suggested we could decorate these cupcakes for Halloween, so I did.

However, these weren't made without...complications. Roommate E decided she was going to take the electric hand mixer to her boyfriend's place to make sugar cookies. I didn't realize this until after measuring the dry ingredients, so I couldn't just pack up and wait another day. Fortunately, and I have no clue why, we had a hand-crank mixer. Thank you, Roommate B1! It is hard to use while creaming the butter, mainly because the bowl wouldn't stay still. Roommate B2 wanted to help, but we both agreed she wasn't allowed in the kitchen until her test results for mono came back (they came back yesterday, and she does not have mono. Good because I caught whatever she had, fortunately the day after baking).


Then when I went to prepare the buttermilk, I discovered my lemon went bad. I only have red wine vinegar, so I decided to use regular milk. A lot of TwDers complained their cupcakes were rather dry. Mine were very moist. I even baked them at the max amount of time.

As for the ganache on top, it was good. Visually, I didn't like the chocolate-on-chocolate because I like color contrast. The orange sprinkles did help a bit. Tastewise, my roommates ate about half, and I gave the rest to whoever was in the computer lab when I was working. My friend demanded I make him just one of these cupcakes for his birthday in two weeks. I'll probably just cut the recipe in half and make him six. I'm sure he can give the other five away no problem.

Chocolate-Chocolate Cupcakes


You can check out the recipe in Baking: From My Home To Yours on pages 215-217 or on Clara's blog. Thanks for picking this week's recipe!

Saturday, August 16, 2008

Sweet Summer Dessert

Before this summer, I have never picked strawberries. I had my mind set that there was no place to pick in western Pennsylvania. Then back in June, the newspaper showed pictures from a local farm's strawberry festival, and a family was featured on the front page picking strawberries. I did some research and found the farm. Sure, it's about 45 minutes from my house, but I thought the trip was worth it.


I think I took this picture after cutting up some berries because it isn't quite as full.

About a week before that, I bought a Hershey's cookbook for $2 at the used book store (oh I'm awesome). I remember flipping through and came across a picture for California Strawberry Log. My dad came over and asked what I was buying this time. I showed him the picture and he said you better be making that for me. He may have been kidding at the time, but I'm sure he didn't mind I took him seriously.

California Strawberry Log


3 eggs, separated
1/2 cup sugar
1/2 cup flour
1/3 cup unsweetened cocoa
1/3 cup sugar
1/2 tsp baking soda
1/4 tsp salt
1/3 cup water
1 tsp vanilla extract
1 Tbsp sugar
2 Tbsp + 3/4 cup powdered sugar, divided
2 cups (1 pint) cold whipping cream
1 tsp vanilla extract
3 cups sliced strawberries

1. Heat oven to 375F. Line 15 1/2x 10 1/2x 1 inch jelly roll pan with foil. Generously grease foil. In large bowl, beat egg yolks on high speed 3 minutes. Gradually add 1/2 cup sguar. Continue beating 2 minutes.

2. Stir together flour, cocoa, 1/3 cup sugar, baking soda, and salt. Add alternately with water and vanilla to egg yolk mixture, beating on low speed just until smooth.

3. In small bowl, beat egg whites until foamy. Add 1 Tbsp sugar and beat until stiff peaks form. Carefully fold into chocolate mixture. Spread batter evenly into pan.

4. Bake 15-18 minutes or until top springs back when lightly touched. Invert onto towel sprinkled with 2 Tbsp powdered sugar. Carefully remove foil. Immediately roll cake and towel together from narrow end. Place on wire rack to cool.

5. In clean large bowl, beat cream, 3/4 cup powdered sugar, and vanilla on high speed until stiff. Fold strawberries into 2 cups of whipped cream. Reserve remaining whipped cream for garnish. Unroll cooled cake and spread with strawberry mixture. Reroll. Spread remaining whipped cream on outside of cake. Refrigerate 1 hour or longer before serving.

Source: Hershey's Chocolate Lover's Cookbook, 1993 p. 110

Tuesday, July 15, 2008

Tuesdays With Dorie - Chocolate Pudding


I have been such a slacker this summer. You would think with no classes or school activities, I would have more time to blog. Oh, I've found plenty of time to bake and cook. I just never get in the mood to actually go online and blog about them. Actually, it has to deal more with my laptop overheating and shutting down without warning rather than laziness. The sad part is I can't open my laptop base (the bezel for you techies) to get to my fan. I can get it 75% open, but not enough to reach the fan. I'm tempted just to shell out the $35 and get it cleaned by professionals. Maybe they can teach me how to open the bezel.

I should have a little more free time now that my internship is finished. I was at Fox 53 with their commercial production department. Just as the name states, clients contact them and they shoot :30 and/or :60 commercials. Right now, not only are they doing commercials, they are working on a huge, 3-hour program for The Children's Institute. It is one of the best schools for children with special needs in the country. The place, especially the kids, made me smile every time we went there.

Because of my unpaid internship, I have been working less at my paid job. What does this have to do with me slacking with Tuesdays With Dorie? Simple - my restricted budget. Most of the recipes picked involved me buying ingredients. Although I would be up for buying fresh produce or whatever, I had to cut back on spending somewhere this summer. Once I start getting more hours at my paid job, I should hopefully be back more often. I'm surprised I haven't been kicked out of the group yet. Whenever I found out today's recipe was chocolate pudding, I ran out and bought whole milk. A 16 oz. container was only 73 cents. I'm not sure if skim milk could be substituted because the fat content may contribute to the creaminess and thickness of the pudding, so if anybody out there used skim milk and was successful, please let me know. Also, I used semi-sweet chocolate chips instead of bittersweet chocolate. If you don't have a food processor, use a blender. Just be careful when pouring the hot milk mixture in because it may overflow.

One thing I noticed while reading the instructions was it is almost the same instructions as the Split-Level Pudding. In fact, the only part that was different is the chocolate ganache part.

Mine took about 3 hours to set rather than the 4 hours Dorie suggests. When serving, use pretty coffee mugs or ramekins. Top with some whipped cream and chocolate shavings (which I didn't have). I guarantee that they taste better than how my picture looks simply because my batteries were dying, and I had to take a quick pic!


Chocolate Pudding


2 1/4 cups whole milk
6 Tbsp sugar
2 Tbsp unsweetened cocoa powder
3 Tbsp cornstarch
1/4 tsp salt
1 egg
2 egg yolks
5 oz. bittersweet chocolate, melted and still warm
2 Tbsp butter, room temperature
1 tsp vanilla extract

1. Bring 2 cups of whole milk and 3 Tbsp sugar to a boil in a medium saucepan. In a blender or food processor, blend 3 Tbsp sugar and egg yolks for 1 minute. Add remaining 1/4 cup milk and pulse just to mix. Then add cornstarch, cocoa, and salt and pulse a few more times.

2. While the machine is still running, very slowly add hot milk mixture. Process for a few seconds more, then pour everything back into the saucepan. Whisk without stopping over medium heat until the pudding thickens and some bubbles burble and pop on the surface. Do not let it boil completely, so if it hasn't thickened yet, feel free to turn down the heat.

3. Scrape the pudding back into the machine (avoid any scorched spots) and pulse a few more times. Add butter, chocolate, and vanilla and pulse until evenly blended.

5. Pour the pudding evenly into four 6-oz or six 4-oz ramekins/cups. Press a piece of plastic wrap over each surface to prevent a milk skin from forming. Refrigerate for at least 4 hours.

Source: Baking: From My Home To Yours, 2006 p. 383

Sunday, June 29, 2008

Can't Decide? Have Both!

Everyone has made this tough decision at some point - chocolate or vanilla? Why not have both? Dorie did just that with her Split-Level Pudding. The bottom layer is chocolate ganache while the top layer is vanilla pudding. I enjoyed this dessert because you can serve the pudding in individual dishes and not worry about sharing or cutting into equal portions. My parents received these mugs as a wedding gift, and I absolutely adore them. We hardly use them because we own a ton of coffee mugs (95% of them are mine: cute and/or witty). Plus Dorie's recipe calls for six ramekins and I only have four.


Split-Level Pudding


Chocolate Layer
2 oz bittersweet chocolate, finely chopped
1/3 cup heavy cream

Vanilla Layer
2 1/4 cups whole milk
6 Tbsp sugar
3 Tbsp cornstarch
1/4 tsp salt
3 egg yolks
2 Tbsp butter, room temperature
2 1/2 tsp vanilla extract

1. Chocolate Layer: Put chocolate in heat-resistant bowl. Bring heavy cream to a boil in a saucepan. Pour over the chocolate and let sit for 30 seconds. Gently stir to blend. Divide among 6 four-ounce ramekins/pudding cups.

2. Vanilla Layer: Bring 2 cups of whole milk and 3 Tbsp sugar to a boil in a medium saucepan. In a blender or food processor, blend 3 Tbsp sugar and egg yolks for 1 minute. Add remaining 1/4 cup milk and pulse just to mix. Then add cornstarch and salt and pulse a few more times.

3. While the machine is still running, very slowly add hot milk mixture. Process for a few seconds more, then pour everything back into the saucepan. Whisk without stopping over medium heat until the pudding thickens and some bubbles burble and pop on the surface. Do not let it boil completely, so if it hasn't thickened yet, feel free to turn down the heat.

4. Scrape the pudding back into the machine (avoid any scorched spots) and pulse a few more times. Add butter and vanilla and pulse until evenly blended.

5. Pour the pudding evenly over each chocolate layer in the ramekins/cups. Press a piece of plastic wrap over each surface. Refrigerate for at least 4 hours.

Source: Baking: From My Home To Yours, 2006 p. 384

Tuesday, June 10, 2008

Bananas For You

When there are leftover, overripen bananas in the house, I tend to make banana bread. However, it has been happening a lot this summer, so I'm getting bored with it. I decided to search around in my cookbook collection and find a new recipe. I found several options but decided to go with Ms. Greenspan's Cocoa-Nana Bread. Just like the name states, it is chocolate banana bread. This one is definitely a keeper (then again, all of Dorie's recipes are). I followed the directions exactly, including putting the loaf pan on a cookie sheet while baking. She notes that it will add extra installation and prevent the bottom of the bread from overbaking. I guess it worked because it turned out fine.


Cocoa-Nana Bread


2 cups flour
1 cup unsweetened cocoa powder
1 1/2 tsp baking powder
1/2 tsp salt
1/4 tsp baking soda
8 Tbsp butter, room temperature
3/4 cup sugar
1/2 cup brown sugar
2 eggs
2 ripe bananas, mashed
3/4 cup buttermilk
1/2 cup chocolate chips

1. Preheat oven to 350F. Grease 9x5 loaf pan and place on an insulated baking sheet.

2. Sift together flour, cocoa, powder, salt, and soda.

3. In a large bowl, beat butter at medium speed for 1 minute. Add both sugars and beat another 2 minutes. Add eggs, one at a time, beating for a minute after each addition. Reduce speed to low and beat in bananas. Add dry ingredients in 3 additions, mixing only until they disappear into batter. Add buttermilk, mixing until incorporated. Stir in chocolate chips. Pour into pan.

4. Bake for 30 minutes. Cover with foil. Bake for another 40-45 minutes or until toothpick comes out clean. Let cool for 20 minutes before removing from pan. Then let cool to room temperature.

Source: Baking: From My Home To Yours, 2006 p.46