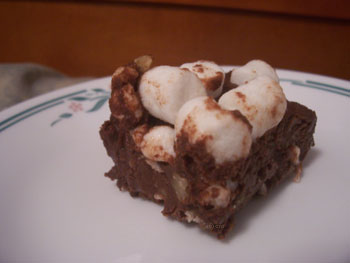
Because I knew I'm not good at fudge, I did my research. I found this recipe to be very helpful in explaining the whys of fudge making. Unfortunately, I bought evaporated milk instead of sweetened condensed milk, so I continued my search. No luck in Google, so I went to Recipe Zaar. I did come across this recipe. I wasn't sure what it meant by a "hard boil" in the directions (well I know what it means, but you need to be precise for candy making). So I decided to use the ingredients from the second recipe and use the directions from the first recipe. I have never had rocky road fudge with almonds, so I used walnuts. I didn't do the washing down of the sides of the saucepan, but I think next time I will because I did get a little bit of the graininess from the sugar crystals.
It is possible to make fudge without a candy thermometer. You just have to be precise in timing. One source says to boil the mixture for four minutes, but I would do more Google research, just in case.
Rocky Road Fudge

1/3 cup butter, cut into chunks
1 cup evaporated milk
1 1/2 cups sugar
1/4 teaspoon salt
12 ounces semisweet chocolate, chopped
1/2 cup walnuts, toasted and chopped
1 cup mini marshmallows
1. Line a 8x8 pan with wax paper.
2. Combine butter, milk, sugar, and salt in a saucepan. Make sure the saucepan is deep enough so nothing bubbles over and a candy thermometer can be clipped on the side without the end tip touching the bottom of the pan. Stir over medium-low heat with a wooden spoon until the mixture begins to boil. As soon as the syrup starts to boil, stop stirring and clip the thermometer to the saucepan. It is important to stop stirring so the crystal structure of the sugar has dissolved. Stirring can encourage the fructose and glucose molecules to rejoin and form sucrose—crystals of table sugar (taken from Science of Candy page).
3. Let the syrup cook, undisturbed, until it reaches the soft-ball stage, about 235° F–240° F. Do not leave the kitchen in case it bubbles over! While it cooks, wash down the sides of the saucepan with a pastry brush dipped in a small amount of warm water to loosen and dissolve any sugar crystals clinging to the sides (taken from Science of Candy page).
4. Once it reaches the soft-ball stage, remove from heat. Stir in chocolate until melted. Fold in the walnuts and marshmallows. Pour into pan. At this point, you can add more marshmallows to the top if desired. Chill in the refrigerator for 2 - 4 hours. Once solid, remove the wax paper from the pan. Peel from fudge; cut into squares.
Sources: Science of Candy and Recipe Zaar
No comments:
Post a Comment